Sites and the site dashboard
Add, rename, and delete sites, read each site's dashboard, change the period, and switch between sites.
What a site is
A site is one place you manage, such as a building, a campus, or a store. In MintCheck, everything else belongs to a site: assets, checklists, workers, inspections, work tasks, and complaints. When you switch to another site, every menu shows that site's data.
Open Sites in the sidebar to see the Site dashboard. It shows one card per site, so you can compare all your sites at a glance.
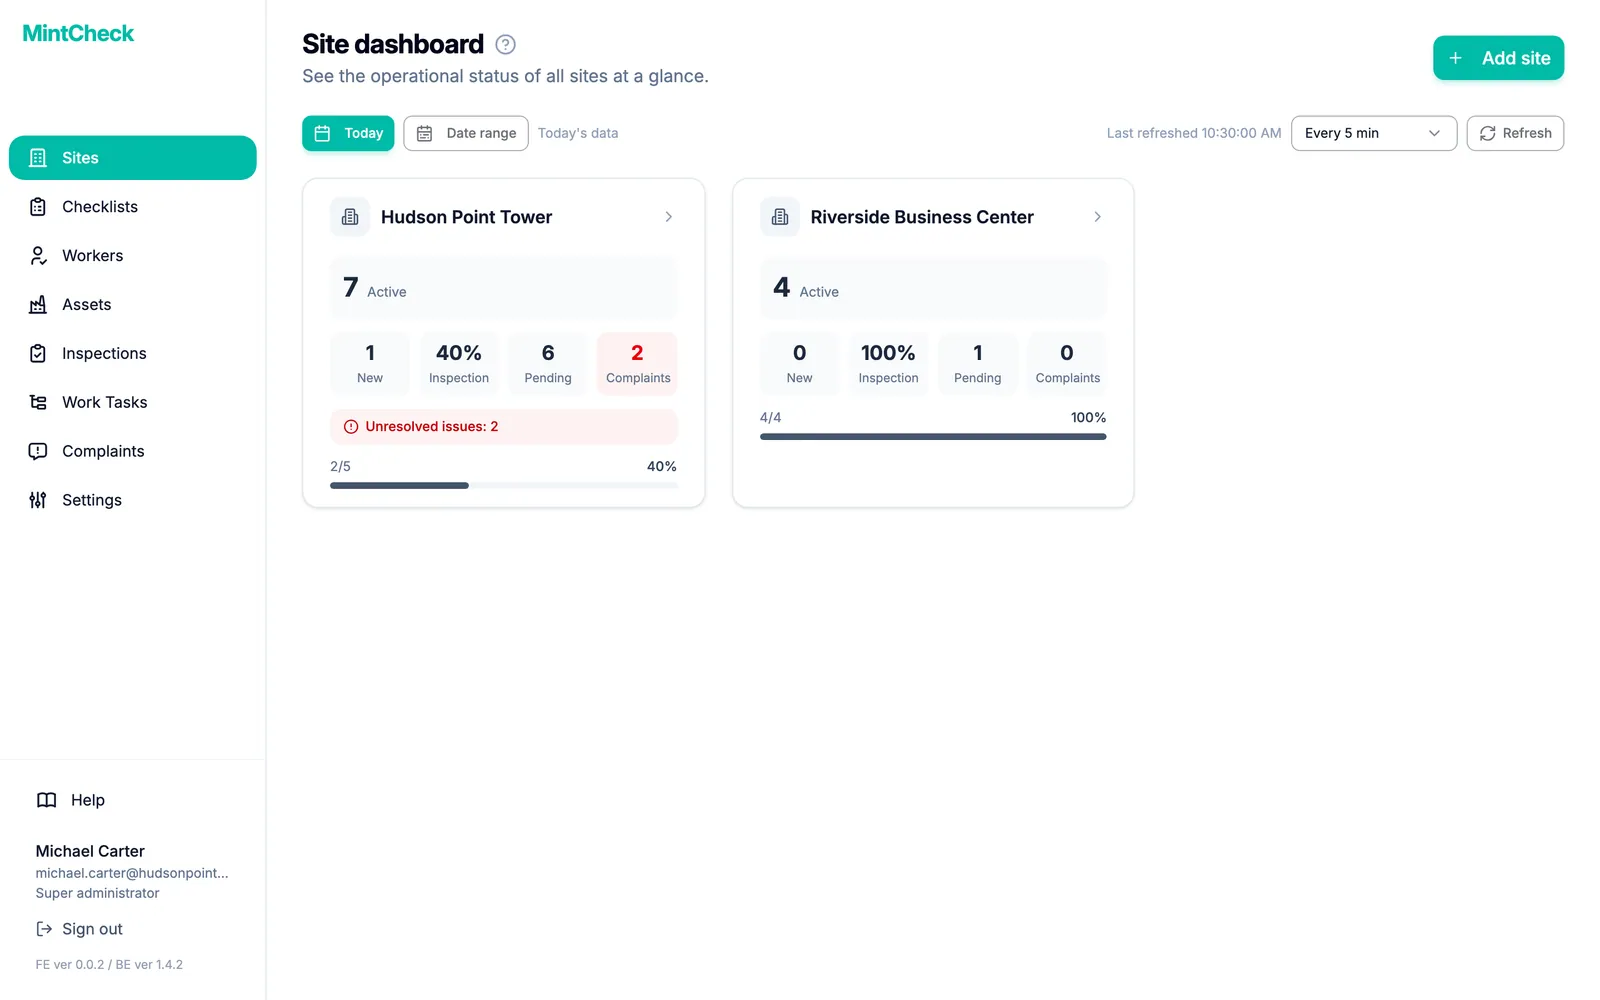
Each card shows the site name and five numbers for the selected period:
- Active: the number of assets in use at the site.
- Workers: the registered workers. When you look at today only, this becomes New, the workers added today.
- Inspection: completed inspections compared with planned inspections, for example 4/6.
- Pending: work tasks that are not finished yet.
- Complaints: complaints received from the public.
If a site has inspection problems that are not resolved yet, its card also shows how many, so you can see at a glance which sites need attention.
Click a card to open that site's own dashboard.
Add a site
Only the super admin can add sites. Sub-admins see only the sites assigned to them.
- In the sidebar, click Sites.
- At the top right, click Add site. A small window opens.
- Type a name in Site name.
- Click Add. The new site appears as a card in the list.
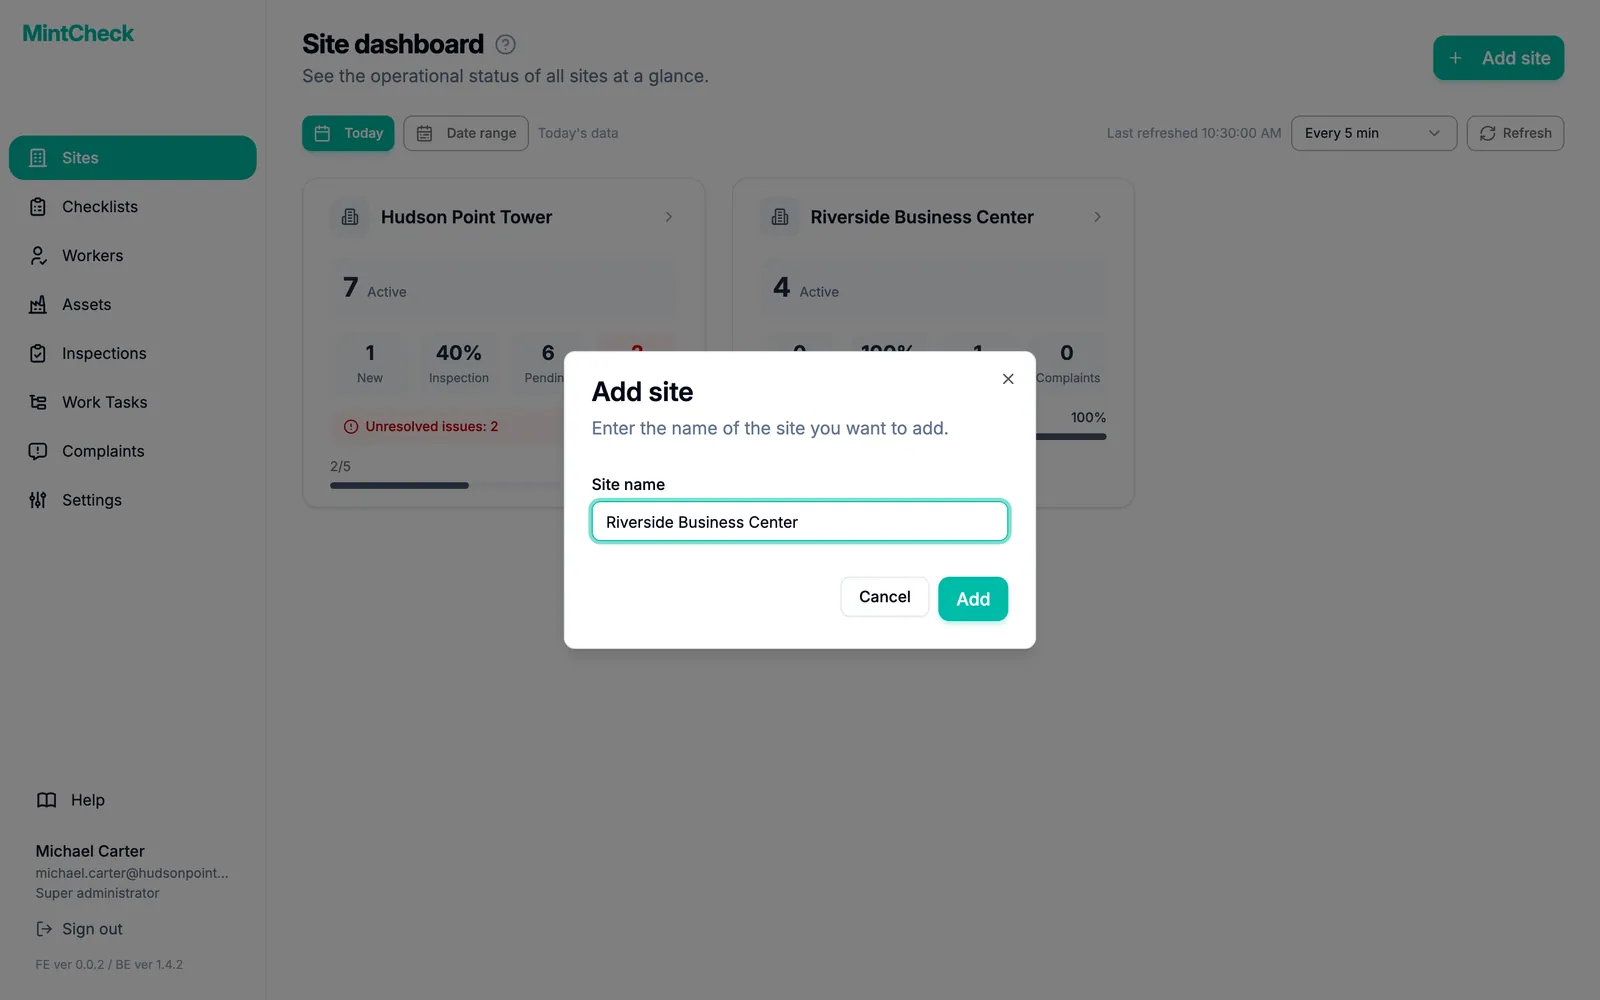
Each site name must be unique in your organization. If the name is already used, MintCheck asks you to choose a different one.
After you add a site, the next steps are usually to create checklists, register assets, and add workers. The Quick start guide walks you through them in order.
Rename a site
If you typed a site name wrong, or the place got a new name, you can change it. Only the super admin can rename sites.
- In the sidebar, click Sites.
- Click the card of the site you want to rename. The site dashboard opens.
- Click the pencil button next to the site name at the top. The Rename site window opens with the current name filled in.
- Change the name in Site name.
- Click Save. The new name appears right away in the sidebar, the site list, and the dashboard.
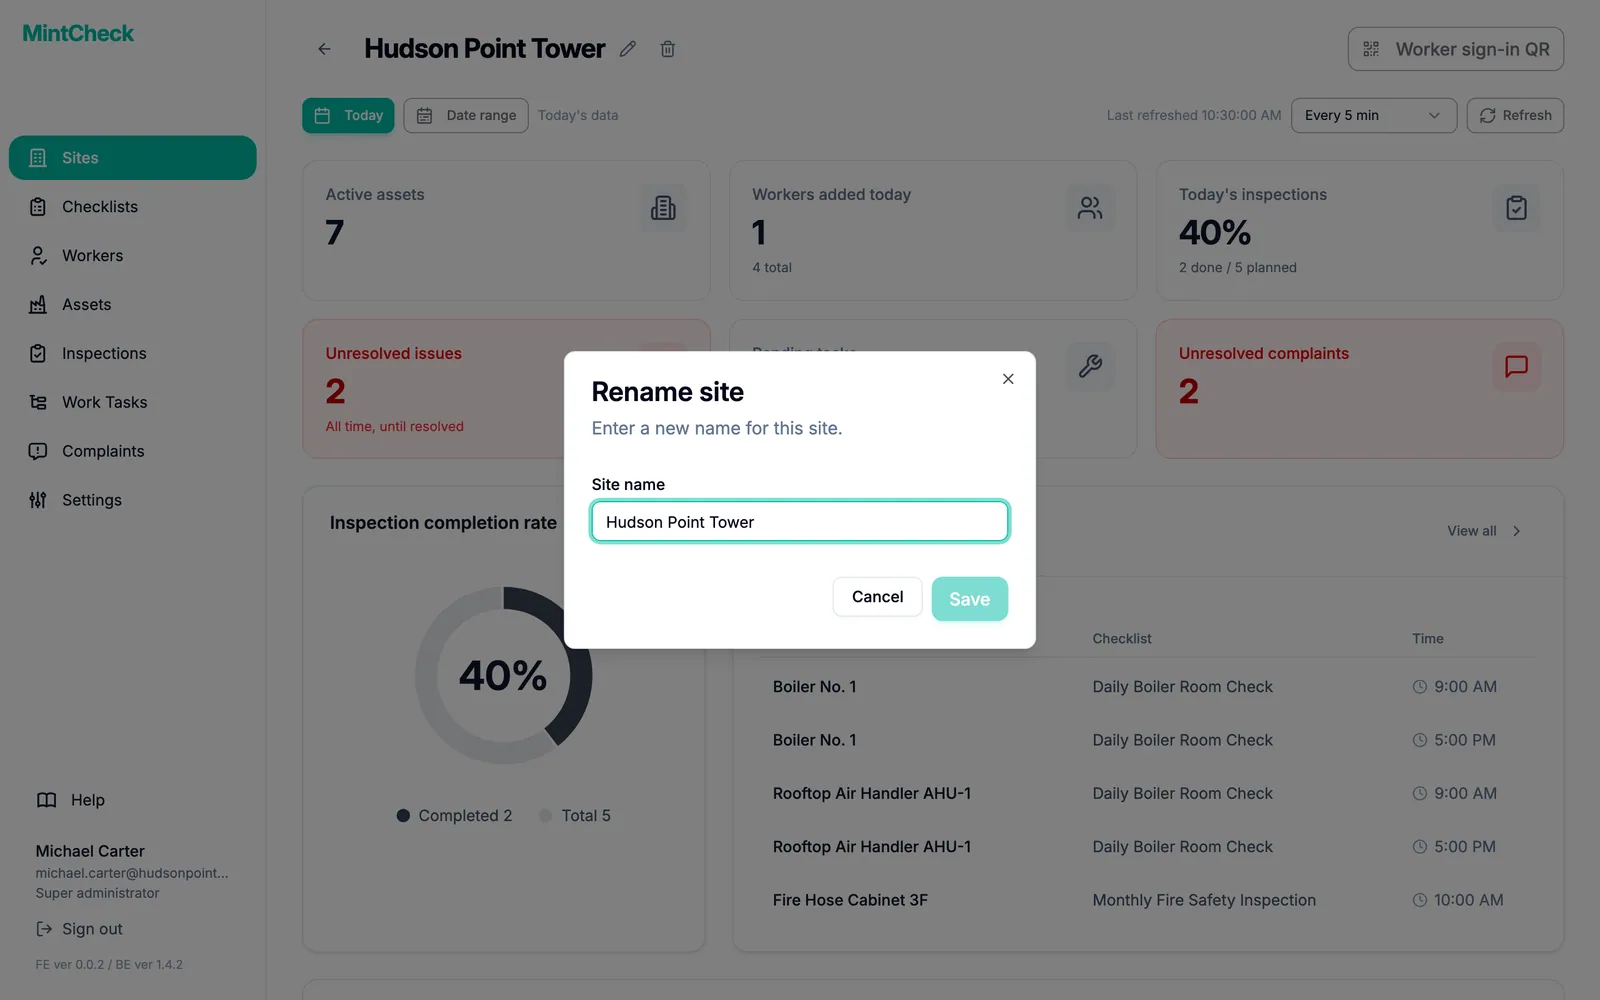
When the window opens, the whole name is selected, so typing replaces all of it. To fix just a few letters, first click where you want to change them. You can't click Save until you change the name. Like a new site name, the new name must be unique in your organization.
Renaming a site changes only its name. Its assets, checklists, workers, and records stay as they are, and every QR code keeps working. If you printed the Worker sign-in QR page before, it still shows the old name. Print it again if you want the new name on it. See Site login QR.
Delete a site
You can delete a site you no longer use. Deleting sites is also how you lower your site count, for example to move to a plan that allows fewer sites. Only the super admin can delete sites.
A site can be deleted only when it is empty. First delete everything that is still attached to it:
- Assets: delete every asset of the site on the Assets page.
- Sub-admins: delete every sub-admin assigned to the site on the Administrators tab.
Then delete the site:
- In the sidebar, click Sites.
- Click the card of the site you want to delete. The site dashboard opens.
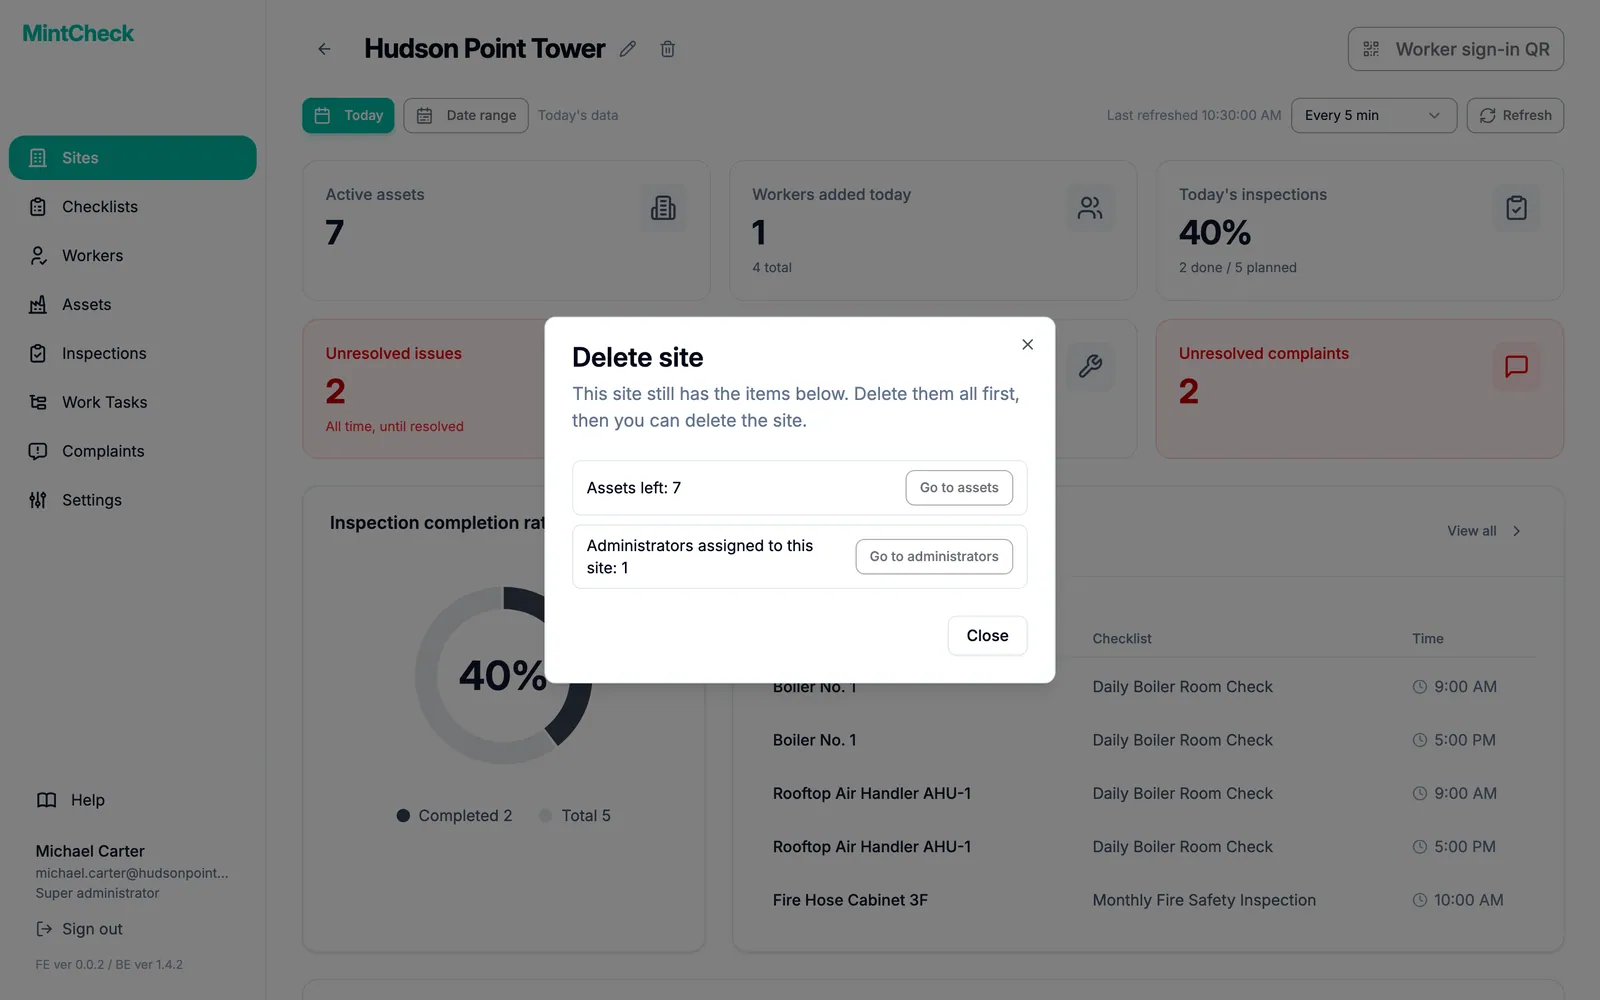
- Click the trash button next to the site name at the top. The Delete site window opens.
- If the site still has assets or sub-admins, the window shows how many are left, with a button that takes you to each page. Delete them, then try again.
- If the site is empty, read the message and click Delete site.
Read the site dashboard
The site dashboard shows how one site is doing. It opens when you click a site card, and it is also the first screen a sub-admin sees.
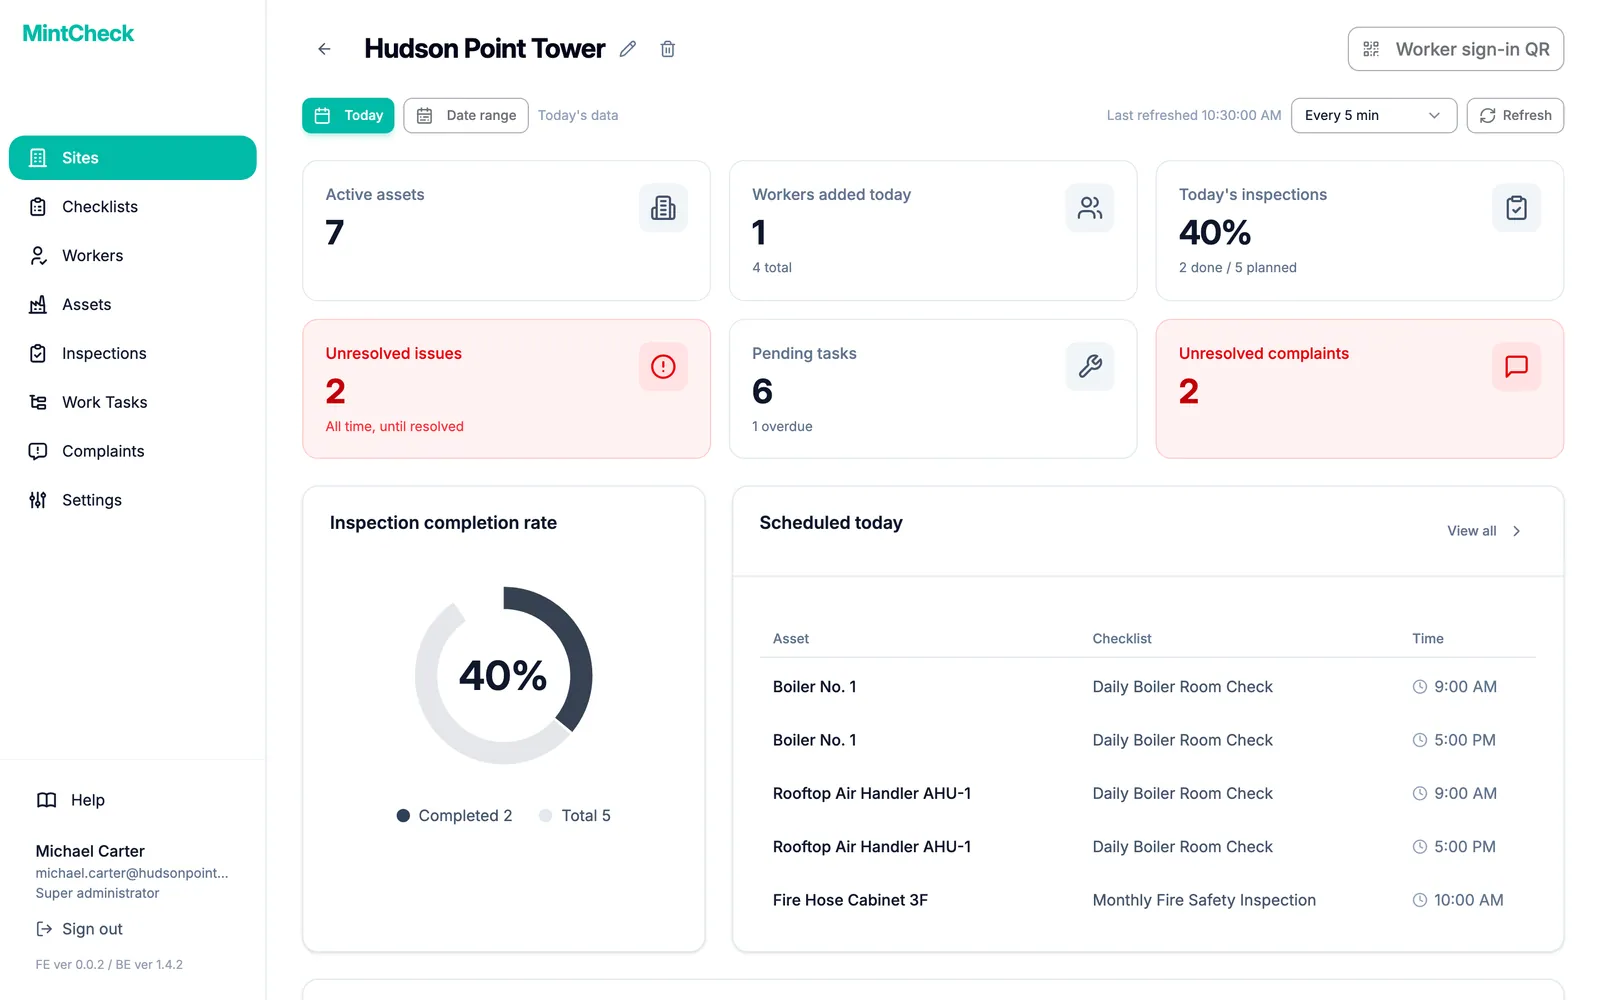
The cards at the top give you the key numbers. Click any card to jump to the matching page.
- Active assets: assets that are in use.
- Workers added today: workers added today. The small text below shows the total number of workers.
- Today's inspections: the completion rate in percent, and below it how many inspections are done out of how many are planned.
- Pending tasks: work tasks that are still open. If some are past their due date, you also see how many are overdue.
- Unresolved complaints: complaints that nobody has resolved yet. The card turns red when there is at least one.
- Unresolved issues: problems found during inspections that are not resolved yet, counted from the start, not only today. The card turns red when there is at least one. Click it to see those problems in the inspection records.
Below the cards you find more detail:
- Inspection completion rate: a ring chart of completed inspections compared with the total planned.
- Scheduled today: each asset and checklist due today, with its time.
- Today's inspections: inspections that workers have already submitted, with the worker, time, and result. Small icons mark re-inspections, attached photos, and problems that are already resolved. See Inspection records.
- Task status: a ring chart of open tasks, split into normal and overdue.
- Pending tasks: the open tasks themselves. Click View all to open the full task list.
- Site complaints: recent complaints, shown only when there are any.
How the planned number is counted
The planned number is not the number of checklists. MintCheck counts every time slot of a checklist once for every asset linked to it. For example, a checklist with two times per day (9:00 and 18:00) that is linked to three assets gives 2 × 3 = 6 planned inspections today. Checklists without a set time count as one slot per day they are due. Logbook checklists have no schedule, so they are never counted. Re-inspections after a fix are not counted either, so they do not raise the completion rate. Learn more in Checklists.
Change the period and refresh
By default, both dashboards show today's data. Use the bar above the cards to change this.
- Click Date range.
- Choose a Start date and an End date.
- Click Search. The numbers now add up everything in that period.
- To go back to today, click Today.
For a period, planned and completed inspections are counted the same way as for a single day, just added up for every day in the period. For example, a checklist with two times per day that is linked to three assets gives 6 planned inspections per day, so 42 for a week. Re-inspections and logbook entries are not counted, and a check with a problem still counts as completed.
The dashboard refreshes itself automatically. Use the interval menu to pick how often, from Every 1 min to Every 30 min, or Off. To update right away, click Refresh. All times are shown in your own device's time zone.
Switch between sites
The name of the site you are working on is shown at the top of the sidebar.
- Click the site name at the top of the sidebar. A list of your sites opens.
- Click the site you want to work on. A short message confirms the switch.
- The page reloads and every menu now shows the new site's data.
The super admin also sees Manage sites at the bottom of this list, which opens the site dashboard. Sub-admins who manage only one site see just the site name, without a list. To give a sub-admin access to a site, see Administrators.