Settings
Find your way around each Settings tab and see which ones only the super admin can use.
Open Settings
Settings is where you manage your organization and your own account. Click Settings in the sidebar. The tabs appear on the left side of the page.
Which tabs you see depends on your role:
| Tab | Super admin | Sub-admin |
|---|---|---|
| General | Yes | No |
| Notices | Yes | No |
| Administrators | Yes | No |
| Billing | Yes | No |
| Account | Yes | Yes |
| Legal | Yes | No |
The super admin is the person who created the organization, or someone they promoted. Sub-admins are the administrators the super admin adds for one site. See Administrators.
General
The General tab holds your organization's basic information.
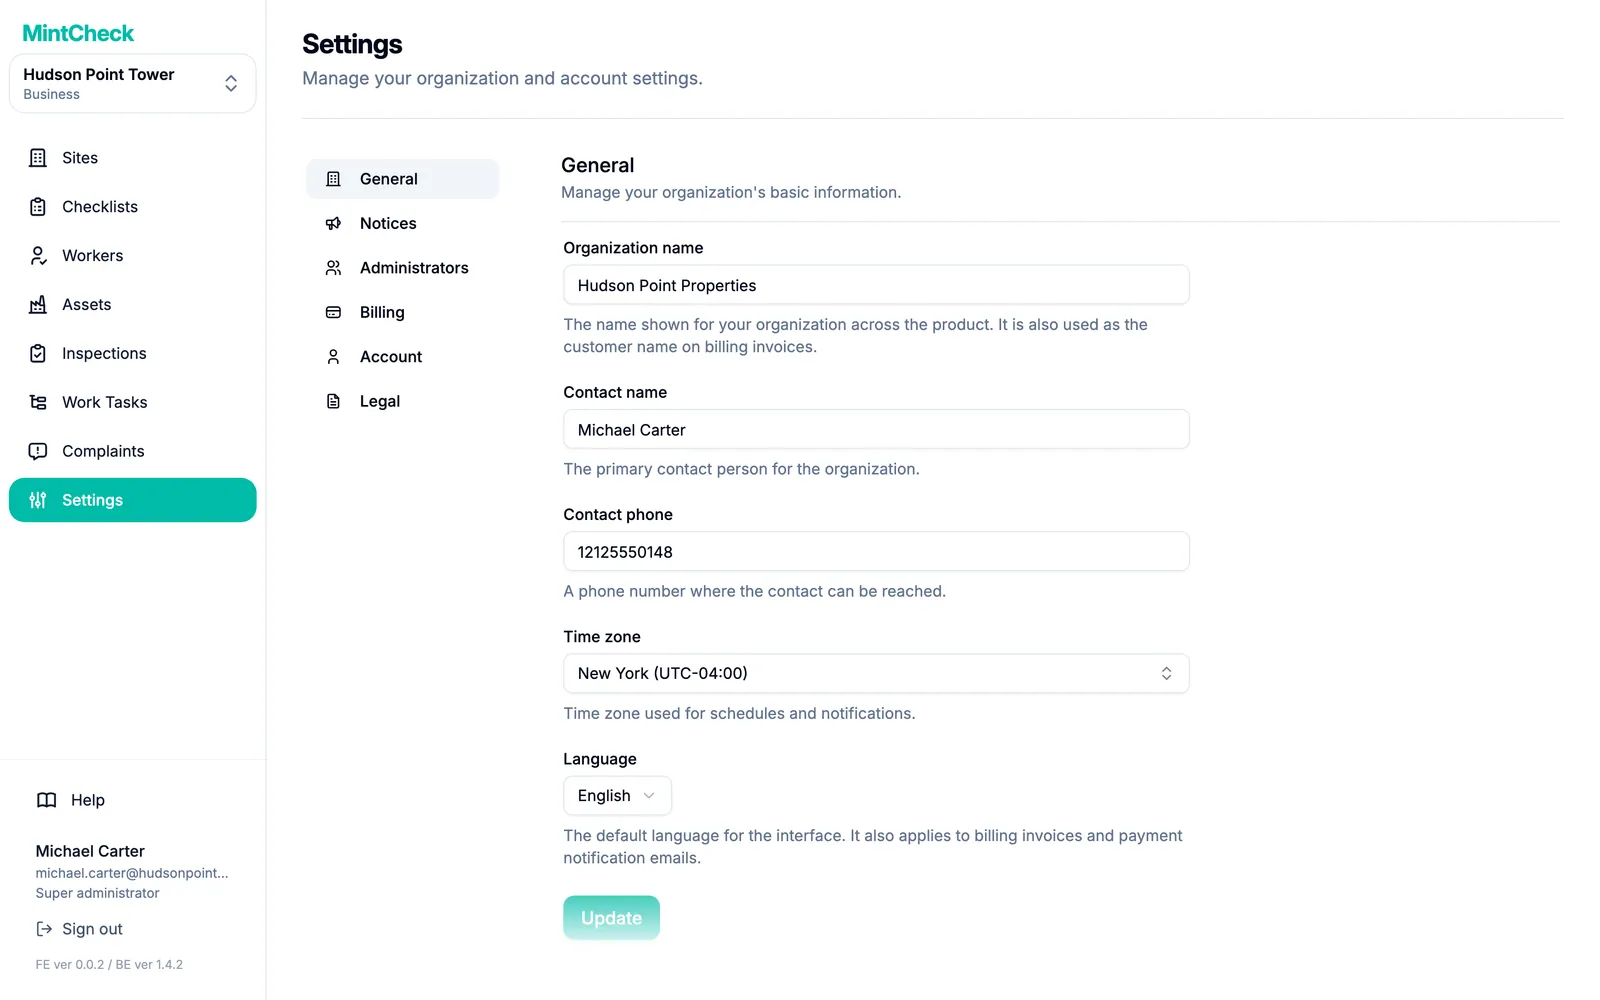
- Organization name: the name shown for your organization across MintCheck.
- Contact name and Contact phone: the main contact person for your organization.
- Time zone: the time zone used for schedules and notifications. It decides which day counts as "today" for workers and when each checklist time slot starts. Type a city name or a UTC offset to find yours quickly.
- Language: the default language of the interface, and the language of the notification emails MintCheck sends to administrators, such as new complaint alerts. MintCheck is available in 37 languages.
Change the fields you need, then click Update at the bottom. If you are setting up the organization for the first time, the button says Save.
Notices
A notice is a short message shown in a banner at the top of the screen, for example "The water supply will be off on Saturday morning".
- Open the Notices tab.
- Choose the Target site, or All for every site.
- Type the Notice message. It can be up to 500 characters.
- Choose the Audience, meaning which administrators should see it.
- Leave Activate immediately on to show it right away.
- Click Create notice.
Your notices appear in the list below the form. Click one to edit it, or to switch it on or off.
Administrators and Billing
- Administrators: add administrators, assign them to a site, and manage their status and password. The tab becomes available after you create your first site. See Administrators.
- Billing: choose a plan, register a payment card, and see past invoices. See Plans and billing.
Account and Legal
The Account tab is for your own login. Every administrator can use it to change their password:
- Enter your Current password.
- Enter a New password. It must have at least 8 characters, with letters, numbers, and a symbol.
- Enter it again in Confirm password.
- Click Change password.
For the super admin, this tab also has a Danger zone section, which is used to cancel MintCheck for the whole organization.
The Legal tab lists the terms of service and policies that apply to your use of MintCheck. Click View full to read a full document.