Logbooks and public entries
Record entries anytime with logbook checklists, and let anyone fill them by scanning a public QR.
Logbooks and scheduled checklists
Most checklists follow a schedule. A fire extinguisher is checked once a month, a restroom twice a day. MintCheck counts these as scheduled inspections and shows how many are done.
Some records don't follow a schedule. They are written whenever something happens: a visitor enters the building, a vehicle leaves, a key is handed out, a fridge temperature is read. For these, use a logbook.
A logbook is a checklist with Logbook (public entry) turned on. The differences:
| Scheduled checklist | Logbook | |
|---|---|---|
| Schedule | Daily, weekly, monthly, or yearly | None. Fill it anytime. |
| How often | Once per time slot | As many entries as needed |
| Counted in scheduled inspections | Yes | No |
| Who can fill it | Registered workers | Registered workers, and anyone if the asset allows public entry |
Create a logbook
- In the sidebar, click Checklists, then Add checklist.
- In the Logbooks category, pick a template such as an entry/exit, cleaning, temperature, patrol, key, or vehicle log. Logbook templates already have Logbook (public entry) turned on. You can also start with Blank checklist and turn it on yourself.
- Check the name and the items. Items work the same as in any checklist: check, multiple choice, text, and photo.
- Click Save.
When Logbook (public entry) is on, the schedule settings are hidden. The editor shows: A logbook has no fixed schedule — it can be filled anytime.
Then link the logbook to the asset where it will be filled, like any other checklist. For example, link an entry/exit log to the "Main entrance" asset. See Checklists for linking.
Let anyone fill the logbook
By default, only registered workers can scan an asset. A visitor or a delivery driver cannot. If people who are not your workers should also write entries, turn on public entry for the asset.
- In the sidebar, click Assets and open the asset.
- Find the Public logbook access card.
- Turn on the switch. The card changes to Anyone can fill.
- A Public logbook QR card appears next to it.
- Print it with Print, save it with Download, or send the link with Copy link.
- Put the printed QR where people will write entries, such as the entrance.
You can also set this in the asset's edit form, in the same Public logbook access section.
Anyone who scans the public logbook QR opens a simple page with the asset name. They fill in the items and tap Submit. No sign-in is needed. After submitting, they can tap Add another entry to write the next one.
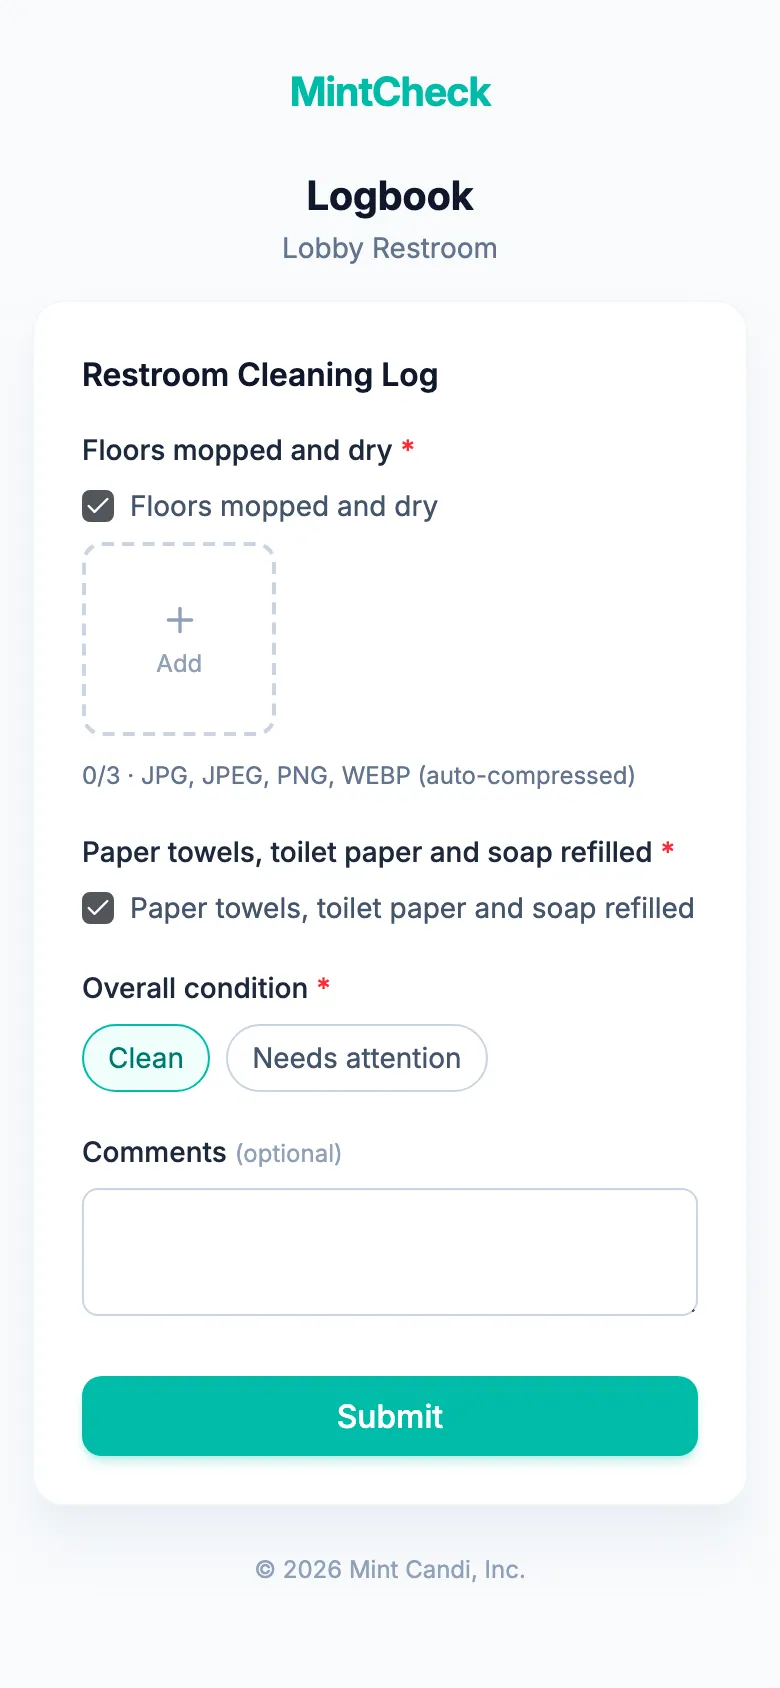
To stop public entries, turn the switch off. The card changes to Registered workers only and the public logbook QR stops working. Registered workers can still fill the logbook by scanning the asset's normal QR code. There, logbook checklists are marked with a Logbook badge.
Where the entries appear
Logbook entries are saved right away. You can review them in two places:
- Asset detail: open the asset. The Logbook section lists all entries for that asset, newest first. It appears only when a logbook is linked to the asset.
- Inspections: Inspections lists logbook entries together with inspections. Instead of a normal or abnormal result, they show a Logbook badge. You can export them to Excel from there.
Entries written by a registered worker show the worker's name. Entries written through the public QR show Anonymous. Times are shown in your own device's time zone.
For more about reviewing records, see Inspections.