Assets
Add assets from templates, link checklists, review each asset's history, and manage plan limits.
What an asset is
An asset is anything you put a QR code on to manage. It can be a piece of equipment, such as an elevator or a fire extinguisher. It can also be a space, such as a restroom or a meeting room, a vehicle, or a paper logbook you want to replace.
Every asset gets its own QR code. Workers scan that QR code with a phone to run checklists and complete tasks for the asset. The public can also use it to send complaints, if you turn that on.
Open Assets in the sidebar to see all assets of the current site. You can search by name, filter by tag with Tag filter, and open any asset by clicking its row.
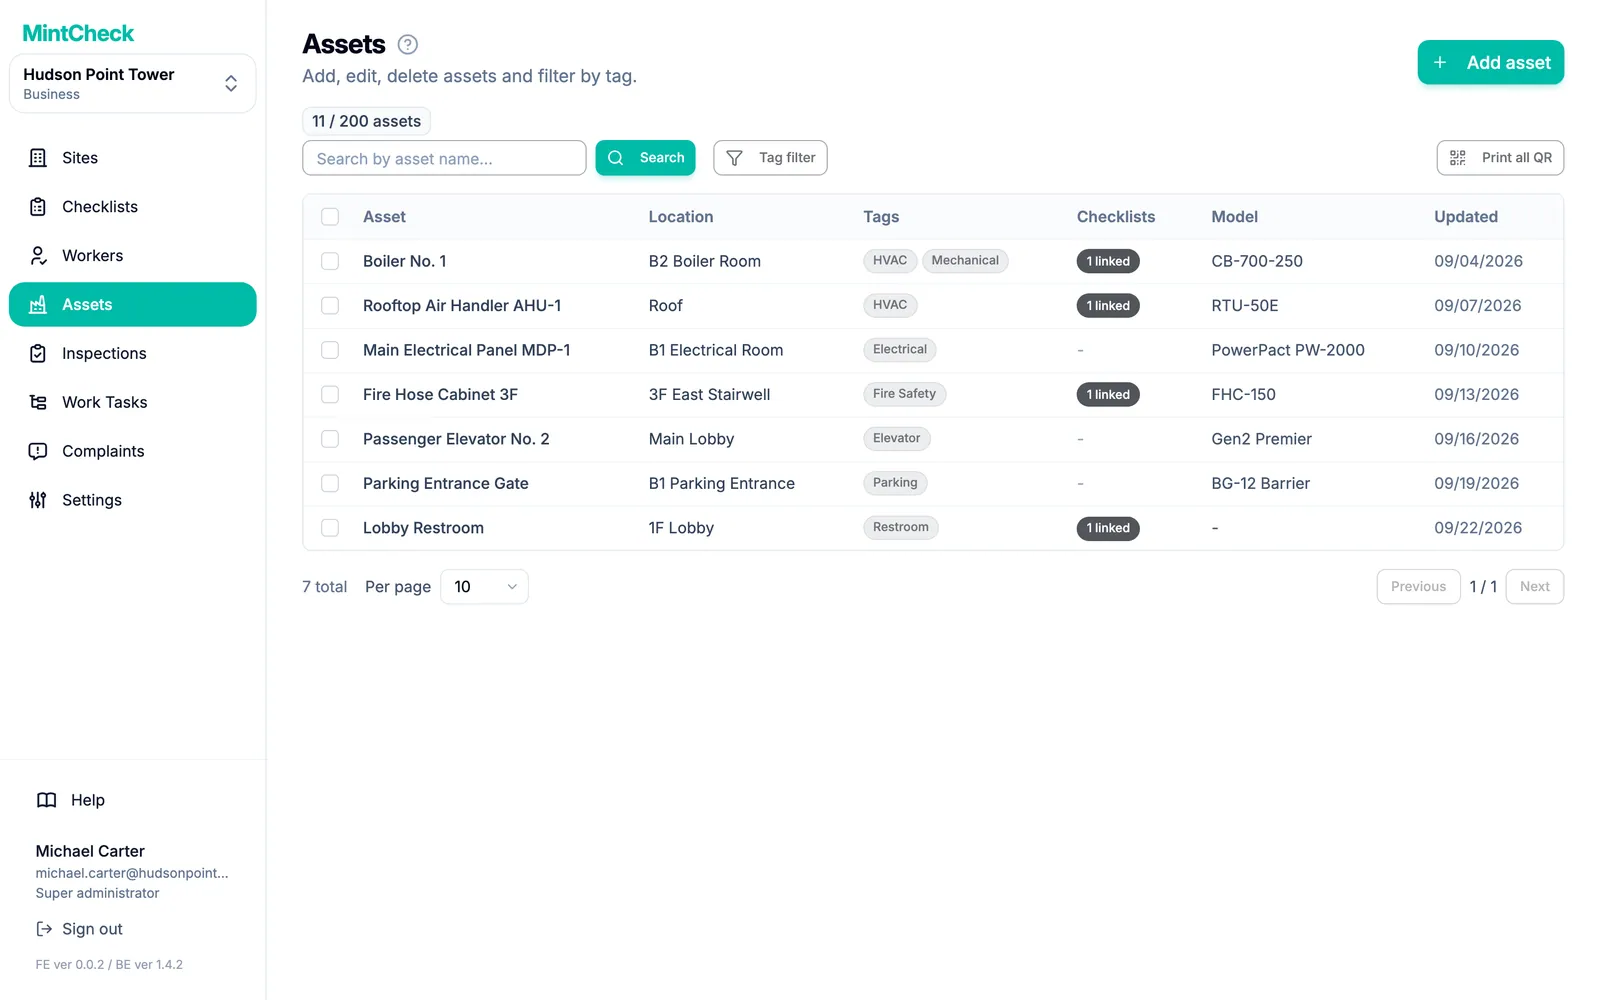
Add an asset
- Go to Assets and click Add asset.
- The template gallery opens. Choose how to start:
- Click Blank asset to fill in everything yourself.
- Or click a template, such as a restroom, a fire extinguisher, or a vehicle. Templates are grouped into Spaces & areas, Equipment & devices, Vehicles, Logbooks, and IT & office devices.
- The asset form opens. If you chose a template, the tags and the custom attribute names are already filled in. You only need to enter the values.
- Fill in the form (see the fields below) and click Save. Each asset name must be unique in the site. If the name is already used, MintCheck asks you to choose a different one.
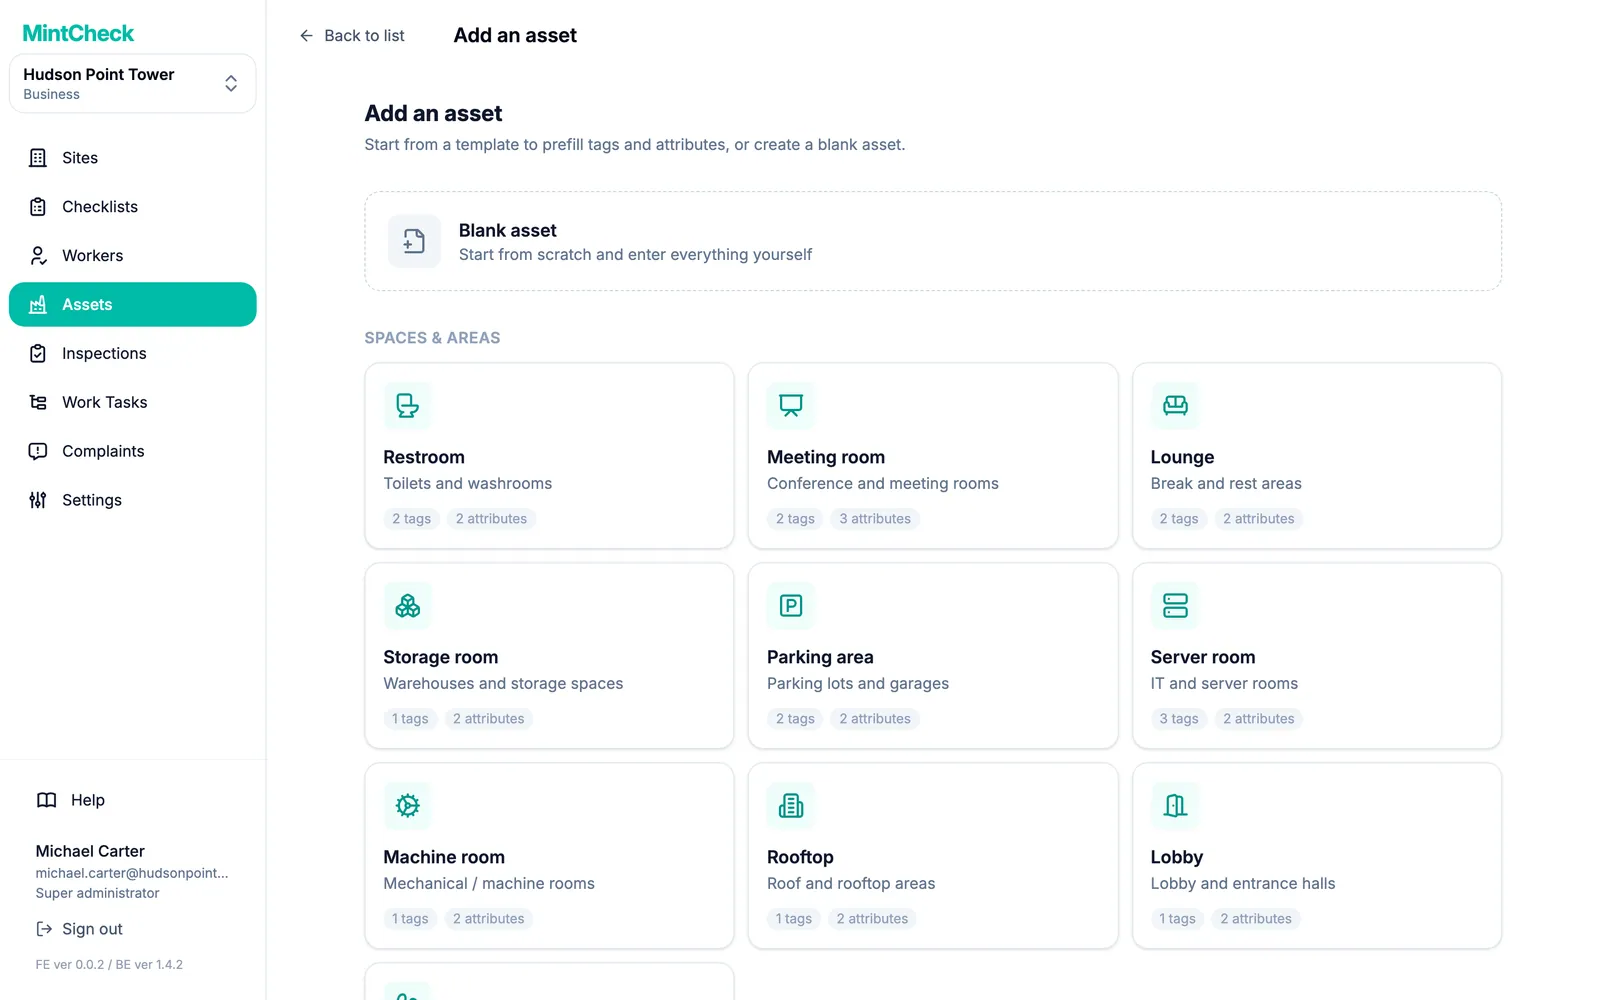
Fill in the asset form
The form has these parts:
- Asset name (required): a name workers will recognize, such as "Restroom 2F East".
- Location (required): pick an existing location or type a new one and add it.
- Asset image: a photo helps workers confirm they are at the right asset. Upload a photo file on the Upload file tab, or paste the address of an image on the web into the Use URL tab and select Import. MintCheck downloads the image and keeps its own copy, so the photo stays even if the original website removes it.
- Floor plans: upload floor plans of where the asset is and mark its location with pins. See "Mark the asset on a floor plan" below.
- Model and Serial number: optional details for equipment.
- Asset tags: short labels such as "Fire safety" or "3F". You can filter the asset list by tag later.
- Linked checklists: the checklists workers run on this asset. You can pick more than one.
- Public logbook access: choose Registered workers only, or Anyone can fill for logbook checklists. See Logbooks.
- Custom attributes: any extra information as a name and a value, such as "Inspection company" and its phone number. Click Add attribute to add one.
If the checklist you need does not exist yet, open the checklist picker and choose Create checklist (new tab). Create the checklist in the new tab, come back, and click the refresh button next to the picker. See Checklists.
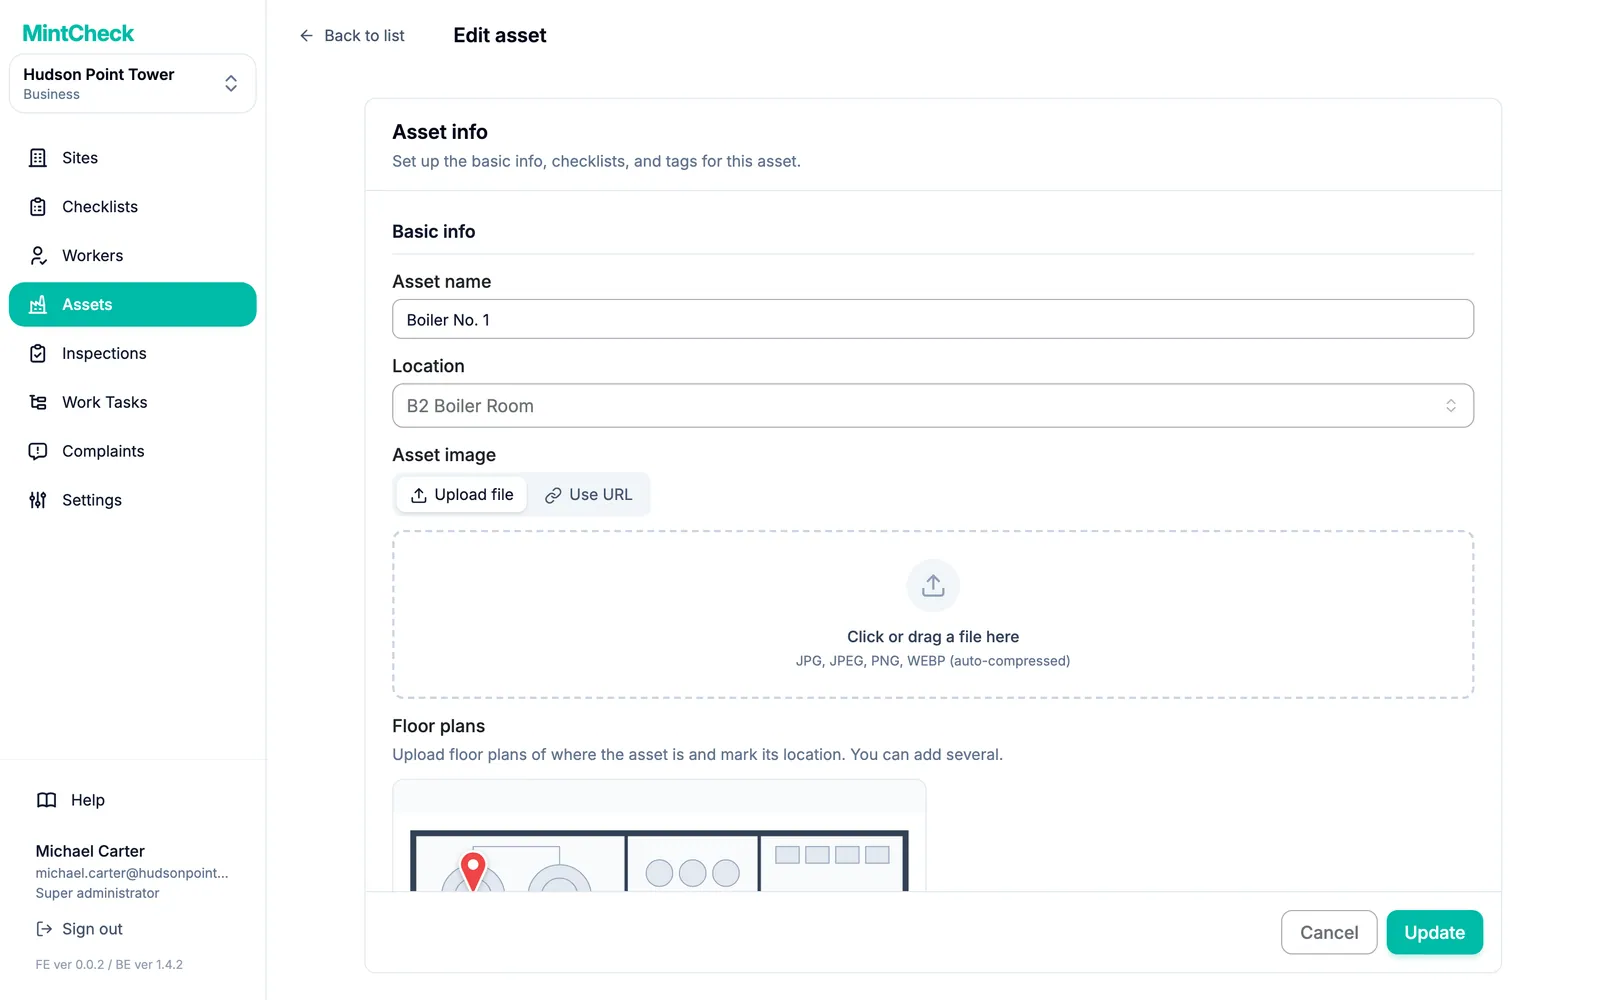
Mark the asset on a floor plan
In a large building, workers can lose time looking for an asset. Upload a floor plan of where the asset is and put a pin on its location. Workers can then open the floor plan from the asset screen and find the asset.
- On the asset form, under Floor plans, select Add floor plan and choose a floor plan image. If you choose several images at once, the editor opens for each one in turn.
- In the editor, click the asset's location on the floor plan to drop a pin. Drag a pin to move it, or select × next to its label to remove it. Zoom in with the zoom buttons to place the pin precisely.
- If you like, enter a Floor plan name, for example "3rd floor plan".
- Select Save to close the editor. Then select Save on the asset form (Update if you are editing an asset). The floor plans are saved only with the asset.
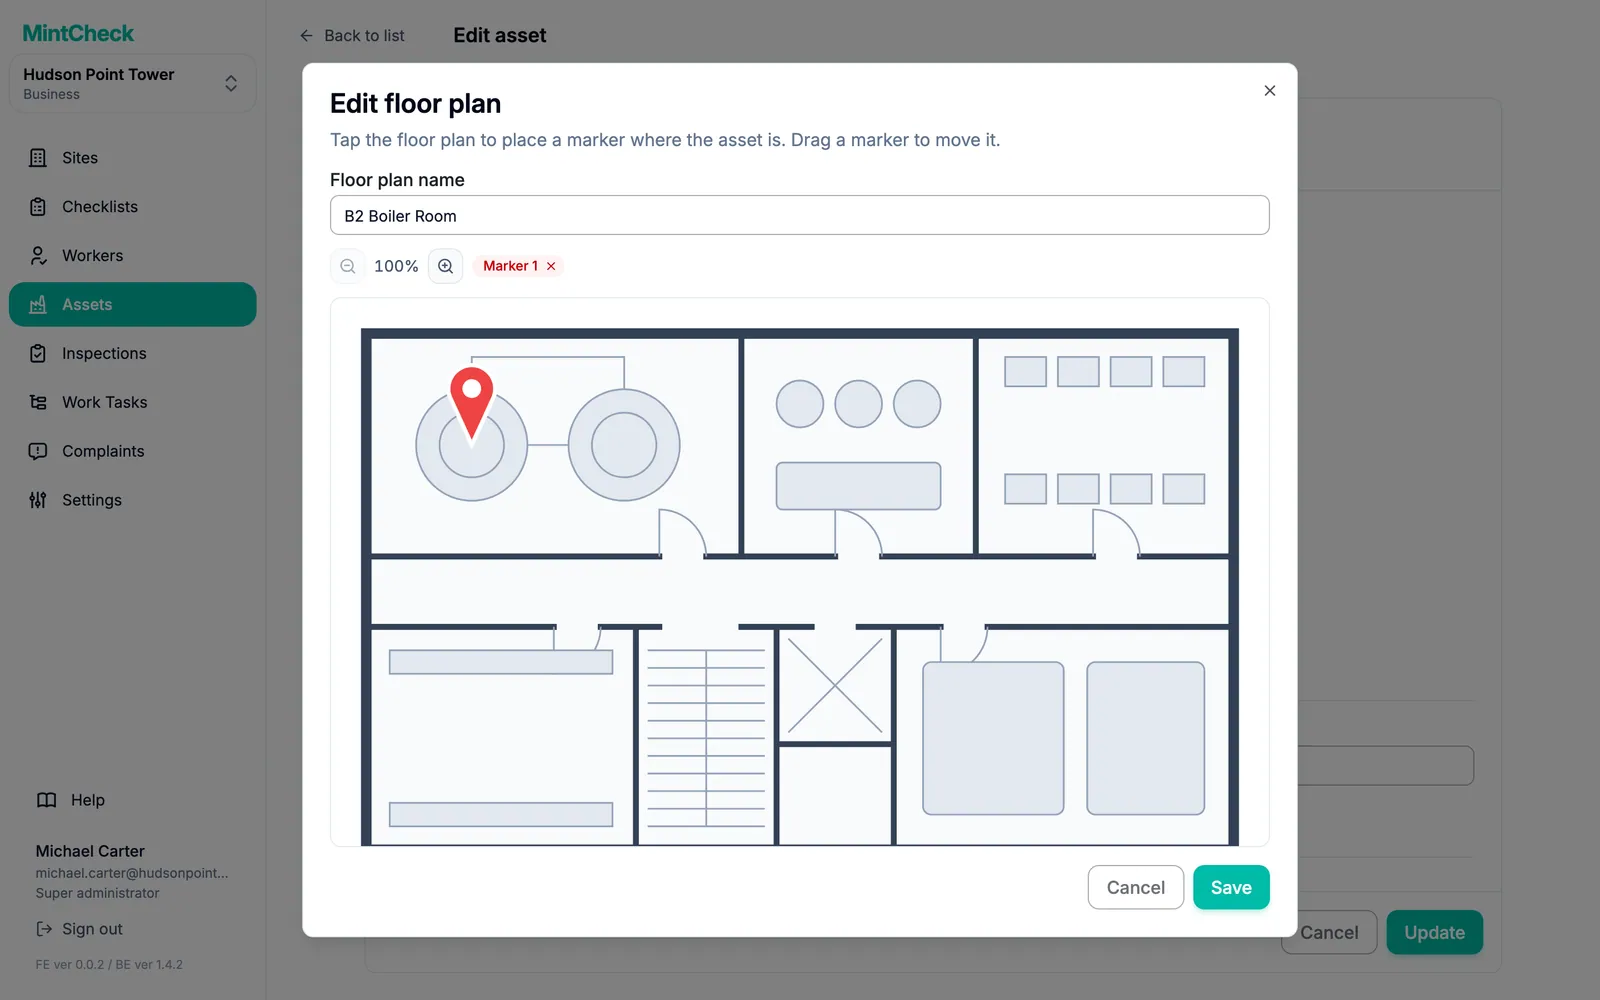
Each asset can have up to 10 floor plans, and each floor plan up to 20 pins. To move the pins later, select the pencil button (Edit markers) on an uploaded floor plan. Floor plans with their pins appear on the asset detail page and on the worker's Asset info screen. See Worker app.
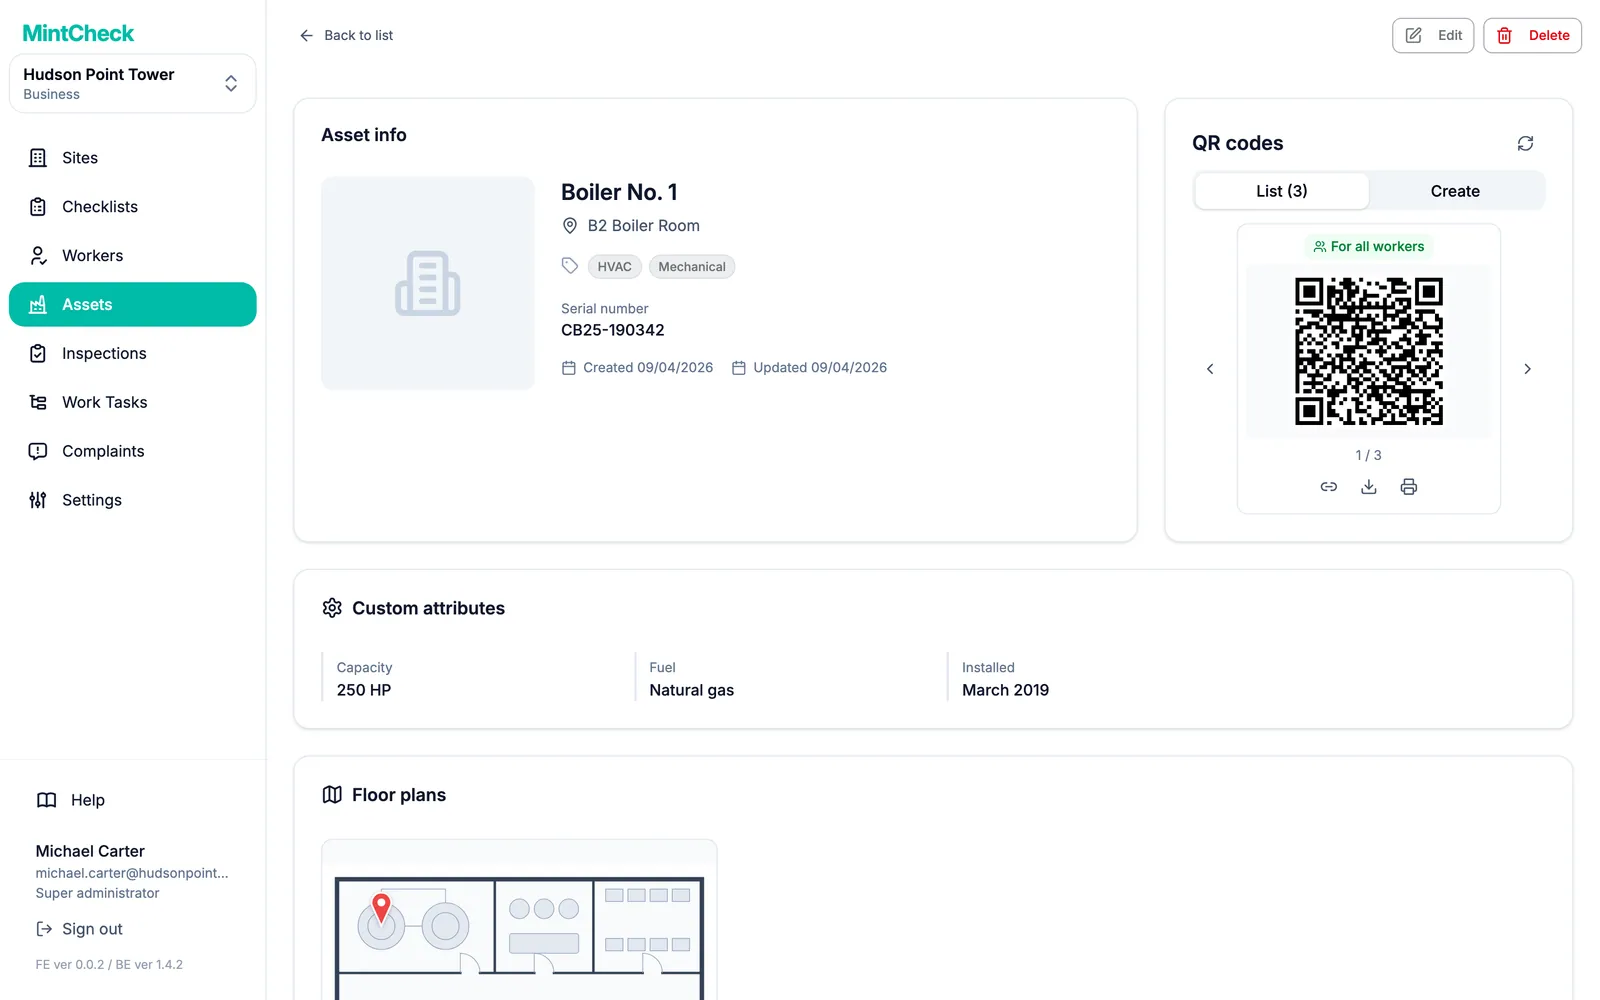
The asset detail page
Click an asset in the list to open its detail page. Here you see everything about the asset in one place:
- Asset info: the name, location, photo, and the asset's QR codes. See QR codes.
- Floor plans: the floor plans with their pins. Select one to see it full size.
- Linked checklists and Scheduled inspections.
- Inspection history: every inspection done on this asset. Click one to see the answers and photos.
- Logbook: shown only when a logbook checklist is linked.
- Tasks for the asset: Pending tasks, Immediate tasks, Overdue tasks, and Completed tasks. Use Export to Excel to download completed tasks. See Work tasks.
- Complaint box settings and Public logbook access. See Complaint box.
To change the asset, click Edit at the top. The same form opens with the current values.
Plan limits and read-only assets
Next to the page title you see how many assets you use, for example "12 / 30 assets". The counter turns amber when you are close to the limit and red when you reach it. At the limit, Add asset opens an upgrade message instead of the form.
If your organization has more assets than the plan allows, some assets become read-only. A notice at the top of the list tells you how many. Nothing is deleted. Upgrading unlocks them right away. Click View plans to compare plans. Limits and prices are explained in Plans and billing.
Delete assets
You can delete one asset from its detail page with Delete. To delete several at once:
- In the asset list, tick the checkboxes of the assets.
- Click Delete in the bar above the list.
- Check the number in the confirmation window and click Delete.