Inspection records
Review completed inspections by day or period, check reported problems, and export records to Excel.
What the Inspections page shows
Every time a worker submits a checklist, MintCheck saves it as an inspection record. The Inspections page collects these records for the site you are working in, so you can check what was done, when, and by whom.
To switch to another site, use the site switcher at the top of the sidebar. The page then shows that site's records.
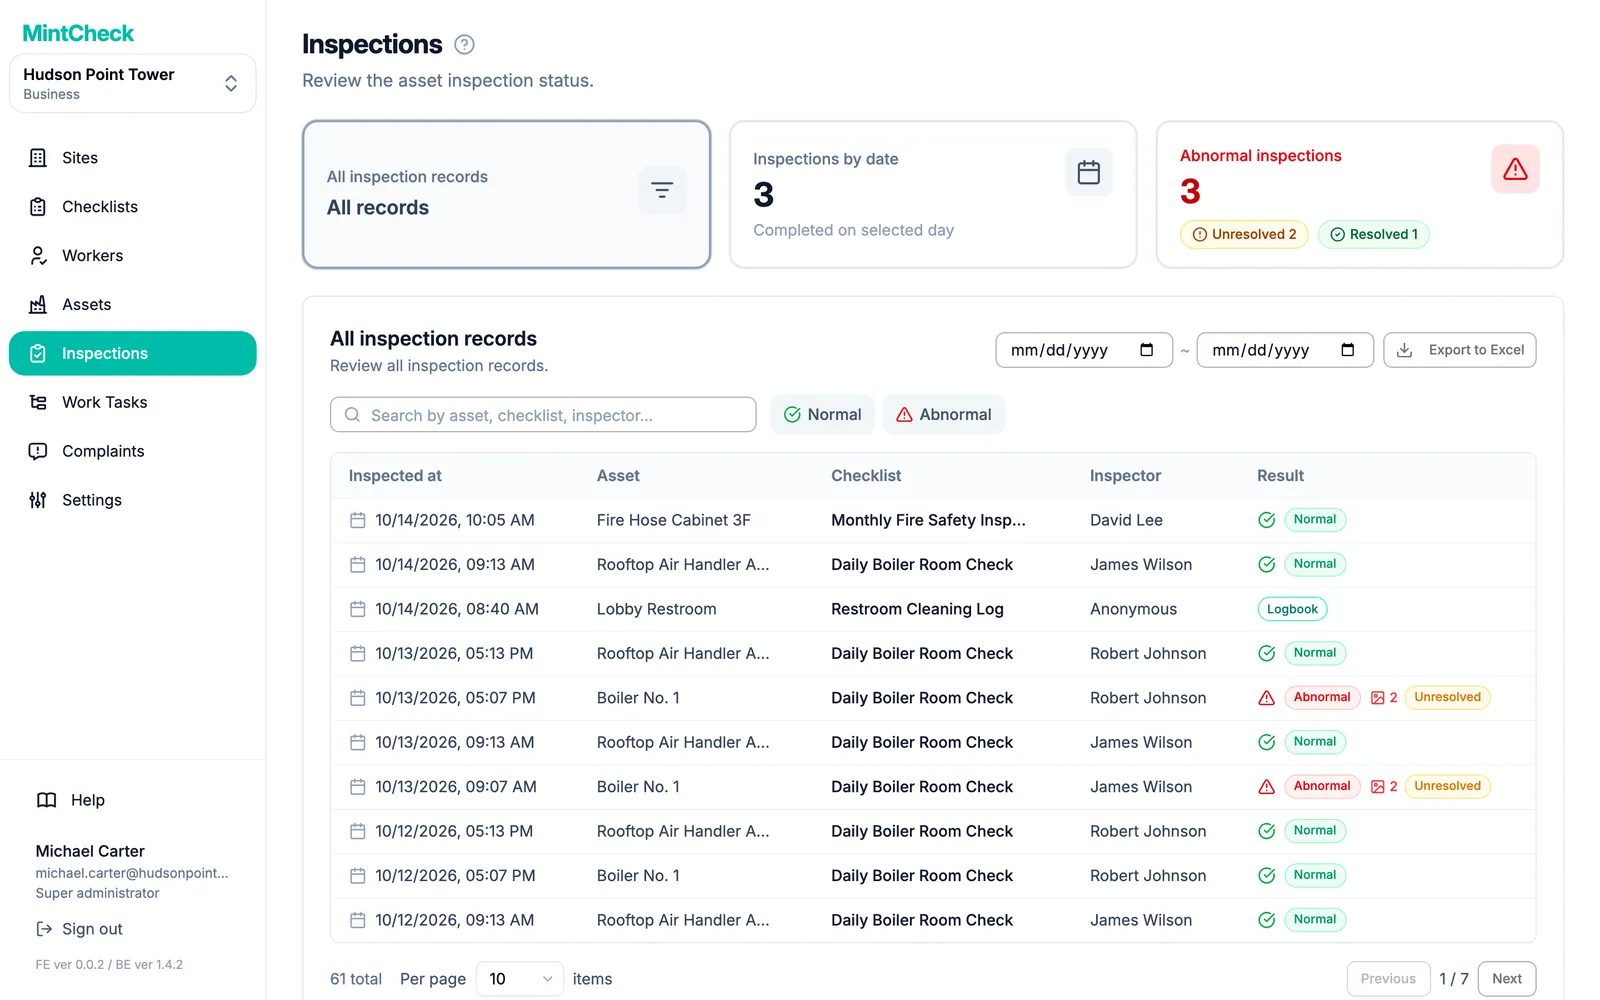
At the top of the page there are three cards. Click a card to open its view:
- All inspection records: every completed inspection at the site.
- Inspections by date: what was planned for one day, and what was completed that day.
- Abnormal inspections: only the inspections where a worker reported a problem.
See what was planned for a day
Use Inspections by date to compare the plan with the results for a single day.
- Click the Inspections by date card.
- Pick a day with the date button. Use the arrows to move one day back or forward, or click Today to jump back to today.
- Under Scheduled checklists, you see each checklist that is due on that day, with how often it repeats and its time slots.
- Under Completed inspections, you see the inspections that workers actually submitted on that day.
If a checklist is in the first list but has no matching record in the second list, that inspection has not been done yet.
A worker can still record a check on a day when the checklist is not scheduled. That record appears in the history, but it is not counted in the planned number for the day.
Find records for a period
The All inspection records view lists all records, newest first. You can narrow it down in three ways:
- By period: choose a Start date and an End date at the top right. The list updates right away. Click Reset next to the dates to clear the period.
- By text: type in the search box to find an asset, a checklist, or an inspector by name.
- By result: click Normal or Abnormal to show only those results. Click Reset to show all results again.
Each row shows Inspected at, Asset, Checklist, Inspector, and Result. Records from a logbook show a Logbook badge instead of a result. To learn more about logbooks, see Logbooks.
Small markers next to the result tell you more at a glance:
- A photo icon with a number: the worker attached that many photos to the problem report.
- Re-inspection: this record is a second check of an earlier problem.
- Resolved or Unresolved: on a record with a problem, whether a later check has confirmed that everything is normal again.
Review problems
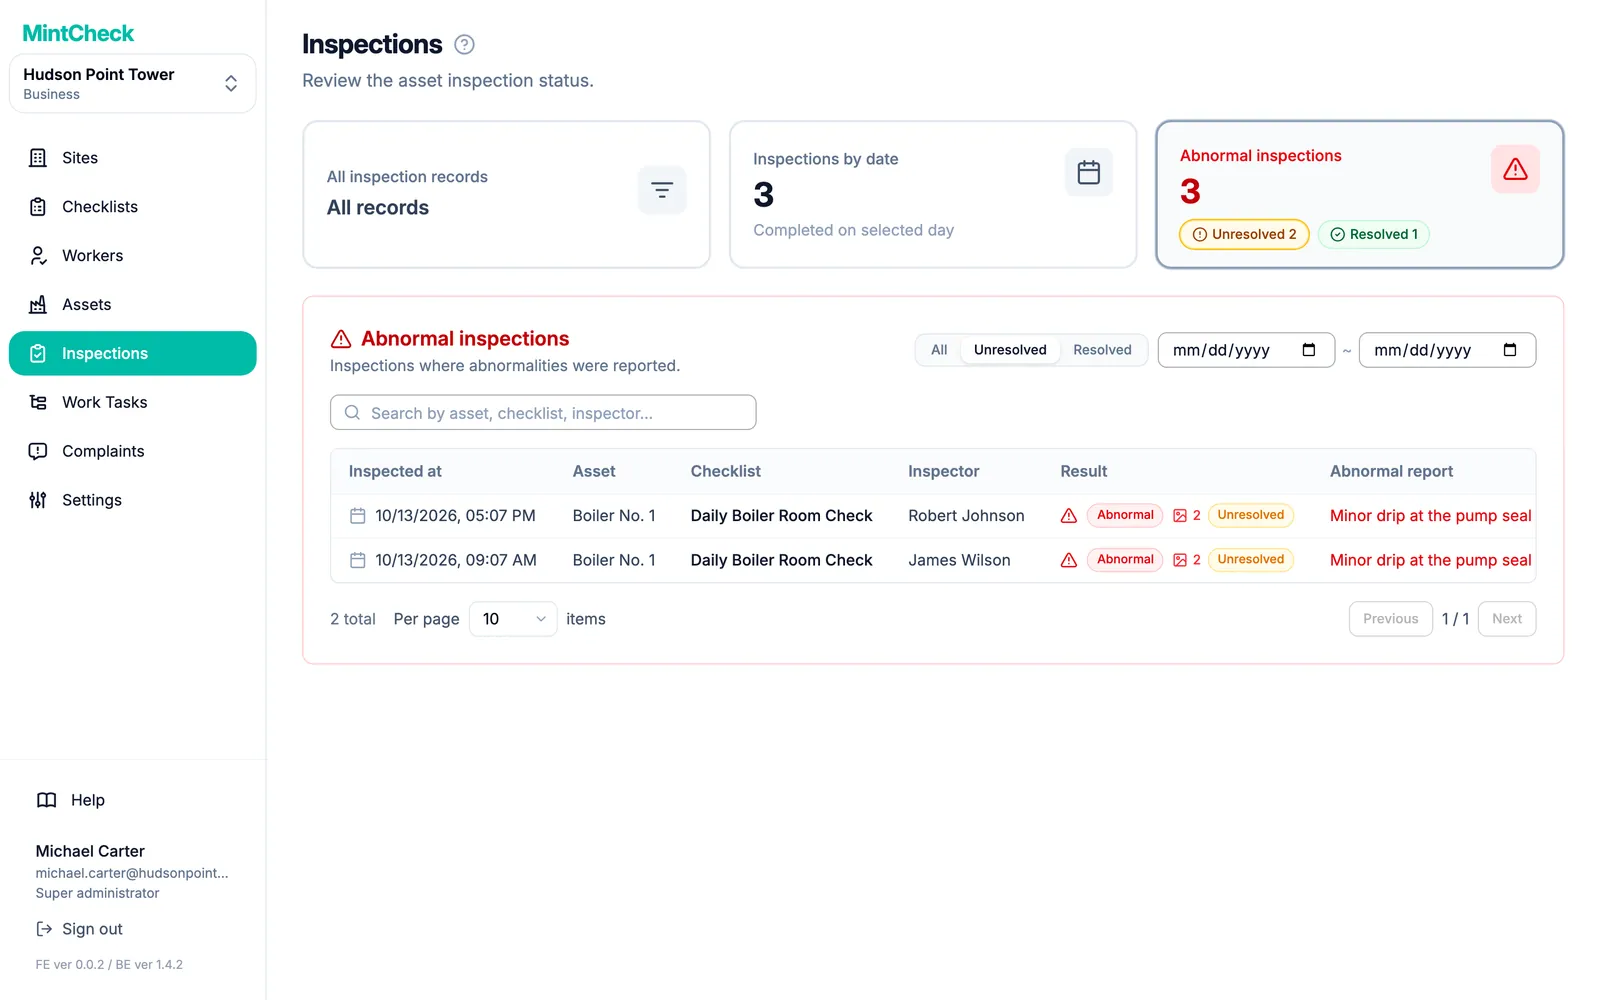
When a worker marks an inspection as Abnormal, they also describe the problem and can attach photos. Click the Abnormal inspections card to see only these records. The Abnormal report column shows the worker's description, and the photo icon shows how many photos they attached.
The Abnormal inspections card shows how many problems were reported, split into unresolved and resolved. Click the unresolved number to go straight to the problems that still need attention. In the list, use Resolution status to switch between All, Unresolved, and Resolved, and pick a period with the date fields.
If nothing went wrong, this view stays empty. A good habit is to check it at least once a day and create a work task for anything that needs fixing. See Work tasks.
How a problem gets resolved
A reported problem stays Unresolved until something confirms it is fixed. There are three ways:
- A re-inspection: after the fix, a worker checks the asset again and the result is Normal.
- The next regular inspection: the next scheduled inspection of the same asset and checklist comes back Normal.
- An administrator: you mark the problem as resolved yourself and write down what was done.
After a problem is fixed, a worker checks the asset again. This second check is a re-inspection.
- A re-inspection is saved as a new record. The original problem report, with its description and photos, stays exactly as it was.
- When the re-inspection is Normal, the original record changes from Unresolved to Resolved.
- Re-inspections do not count as extra planned or completed inspections, so they do not change the day's completion rate.
- Once a record has a re-inspection, it can no longer be edited.
A separate re-inspection is not the only way to close a problem. When the next regular inspection of the same asset and checklist comes back Normal, MintCheck marks every earlier unresolved problem for that asset and checklist as Resolved automatically. If that inspection is Abnormal again, the earlier problems stay open. Logbook entries never close a problem.
A worker can't turn a problem report into Normal by editing it. They can still correct the description and photos, but the problem is only closed by a normal re-inspection or a normal next inspection.
Keep an eye on records marked Unresolved: the problem was reported, but nobody has confirmed the fix yet. The site dashboard also shows how many problems are still unresolved, no matter when they were reported. Workers can find the steps in Worker app.
Mark a problem as resolved yourself
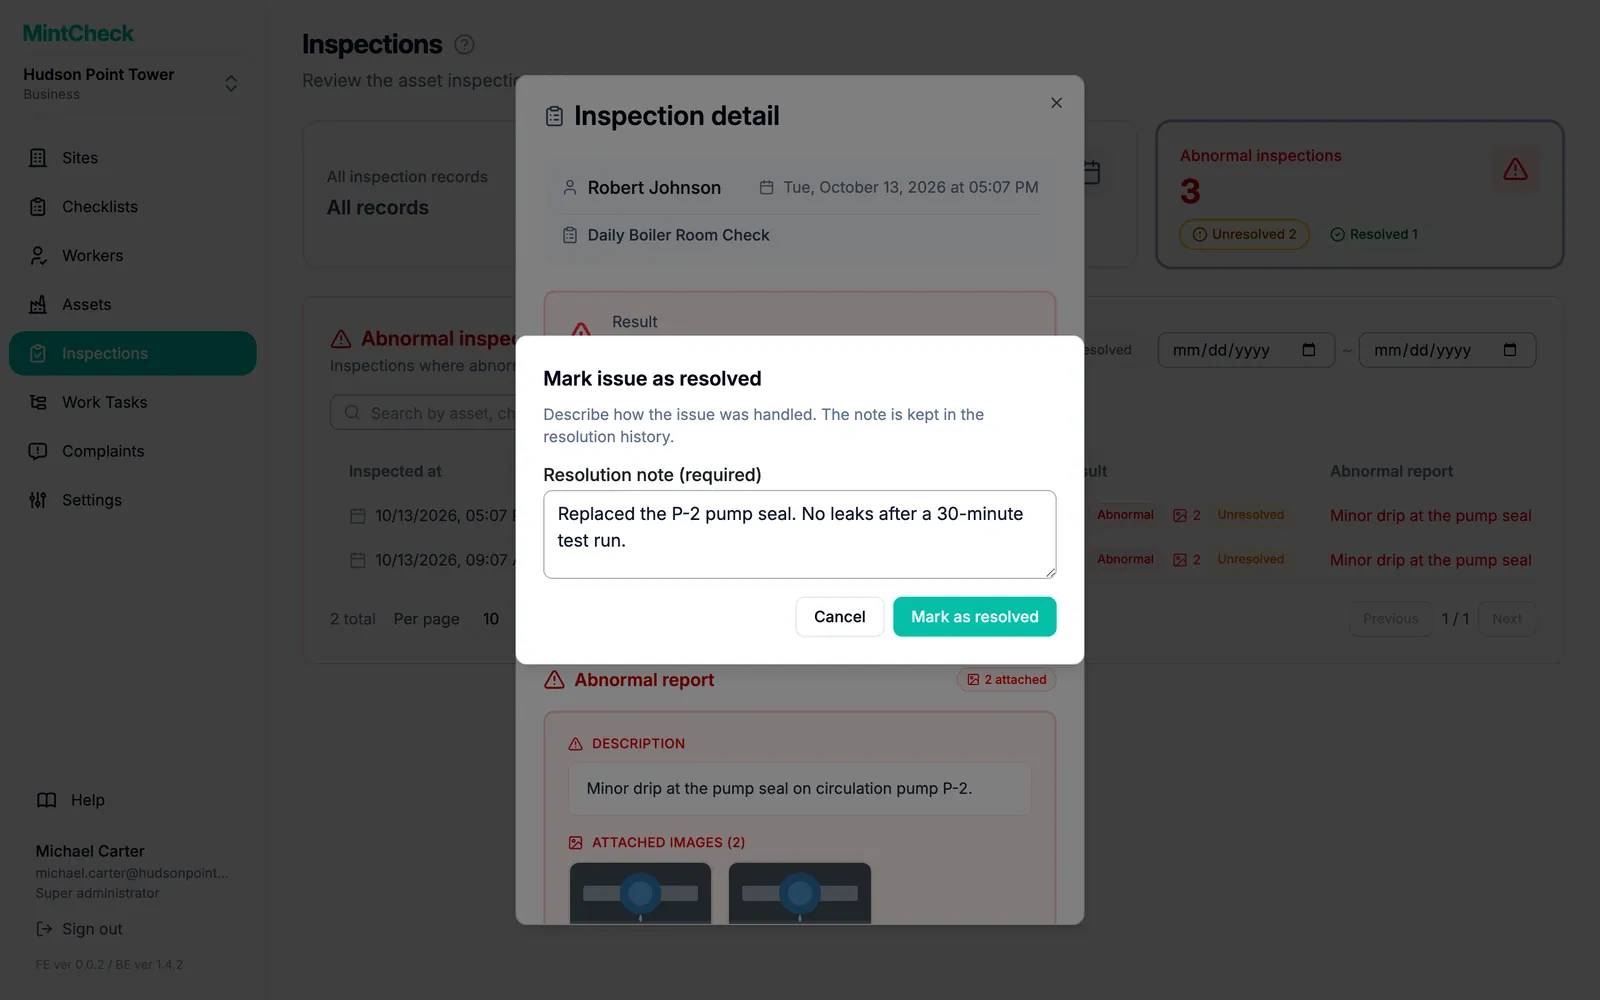
Sometimes a problem is handled without a new inspection, for example when a contractor replaced a part or the issue turned out to be a false alarm. In that case you can close it yourself.
- Open the problem record from the list.
- Click Mark as resolved.
- Write in Resolution note (required) what was done. You can't confirm without a note.
- Confirm. The record changes to Resolved.
Super admins and the administrators of the site can do this.
See how a problem was resolved, or reopen it
When you open a resolved problem, the Resolution section shows how it was resolved (Resolved by re-inspection, Resolved by next regular check, or Resolved by admin), when, by whom, and the note. If a later inspection closed it, click View resolving record to open that inspection. If the checklist is deleted or removed from the asset, or the asset is deleted, problems that are still unresolved are closed automatically and show Closed: checklist removed or Closed: asset deleted.
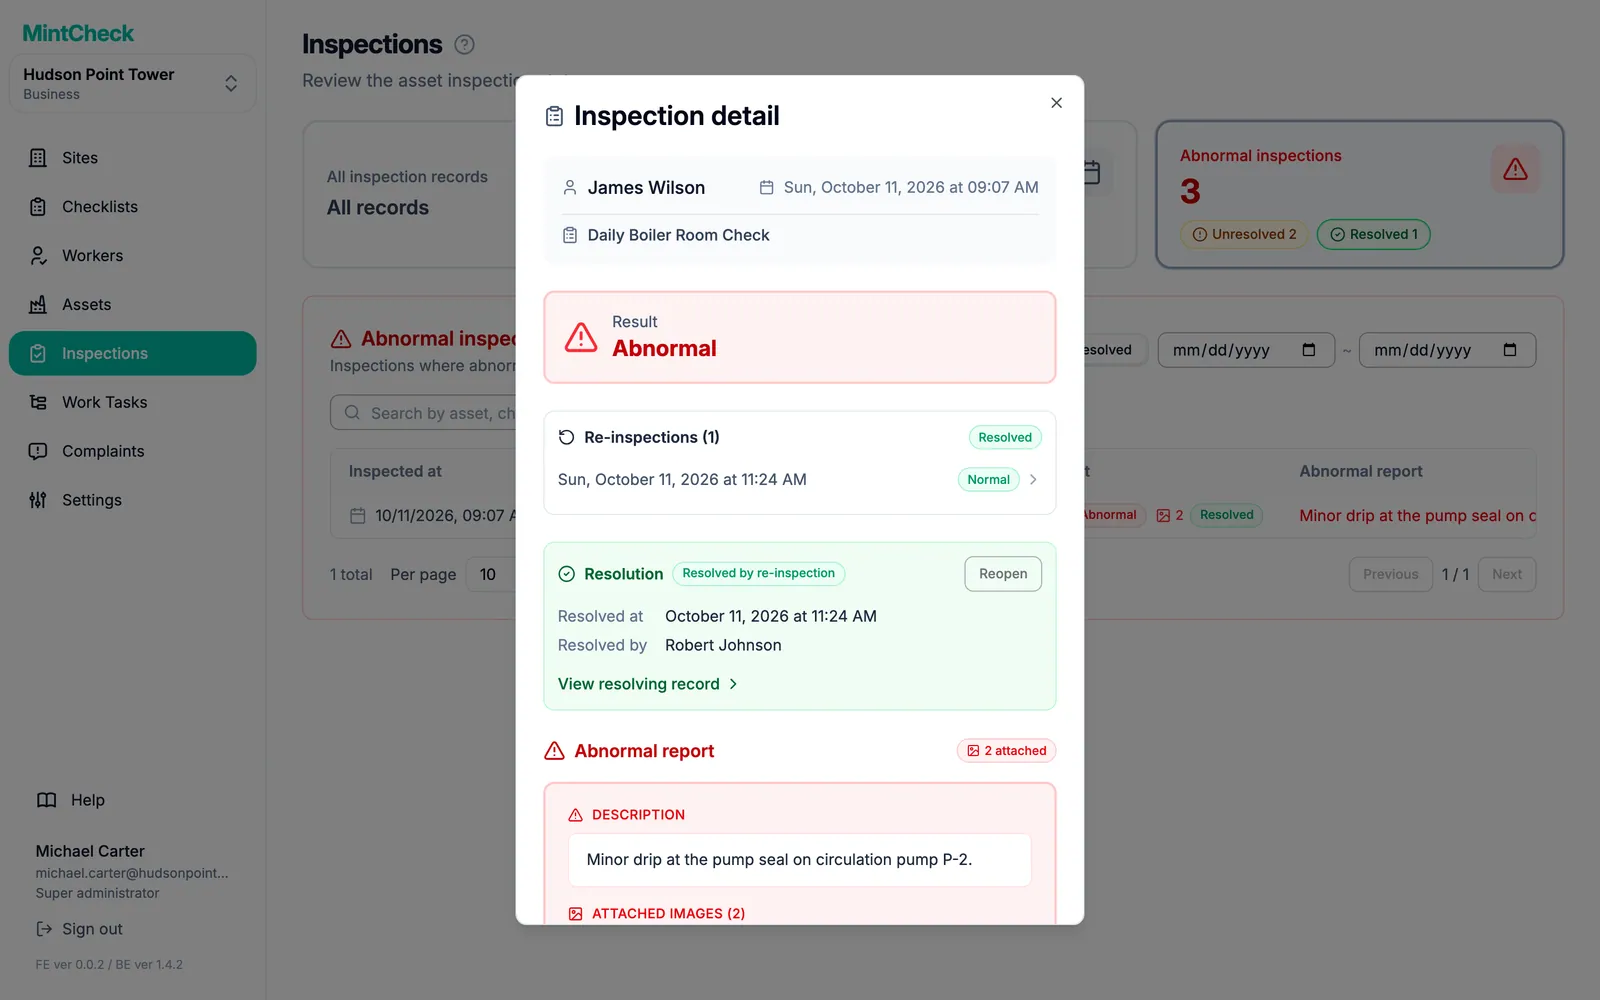
If the problem turns out not to be fixed after all, click Reopen and confirm. The record goes back to Unresolved, and you can resolve it again later.
Open a record
Click any row to open Inspection detail. The window shows:
- Result: the overall result the worker chose.
- Abnormal report: the problem description and photos, if the result was abnormal. Click a photo to see it larger.
- Item responses: the answer to every checklist item, such as checked items, text, chosen options, and photos.
- Notes: any extra notes from the worker.
For a record with a problem, the window also lists its re-inspections with their time and result. Click one to open it. When you open a re-inspection, click View original to go back to the original problem report.
Close the window to return to the list.
Export to Excel
You can download inspection records as an Excel file, for example for a monthly report.
- Click the All inspection records card.
- Set the Start date and End date for the period you need. Leave them empty to export all records.
- Click Export to Excel.
The file includes every record in the chosen period, not only the page you are looking at. It lists the inspection time, asset, checklist, inspector, result, and the problem description for abnormal results. The search box and result buttons do not change what is exported.