Complaint box
Let visitors report problems by QR code, with optional email verification, and see where reports arrive.
What the complaint box does
The complaint box lets anyone report a problem with an asset, without an account. A visitor scans the complaint QR code next to the asset, writes what is wrong, adds photos, and sends it. You receive it in MintCheck and can follow it up.
This is useful for places the public uses every day, such as restrooms, elevators, lobbies, or parking areas. People on the spot often notice problems before your staff do.
You turn the complaint box on for each asset separately.
Turn on the complaint box
- Open Assets and click the asset.
- Scroll down to Complaint box settings.
- Turn on Enable complaint box. The setting is saved right away.
- The Complaint QR code appears next to the settings. Download or print it and put it up near the asset. See QR codes.
- Optional: write a short message in Guide text, then click Save guide text. Visitors see this message at the top of the form. For example: "Tell us if this restroom needs cleaning or repair."
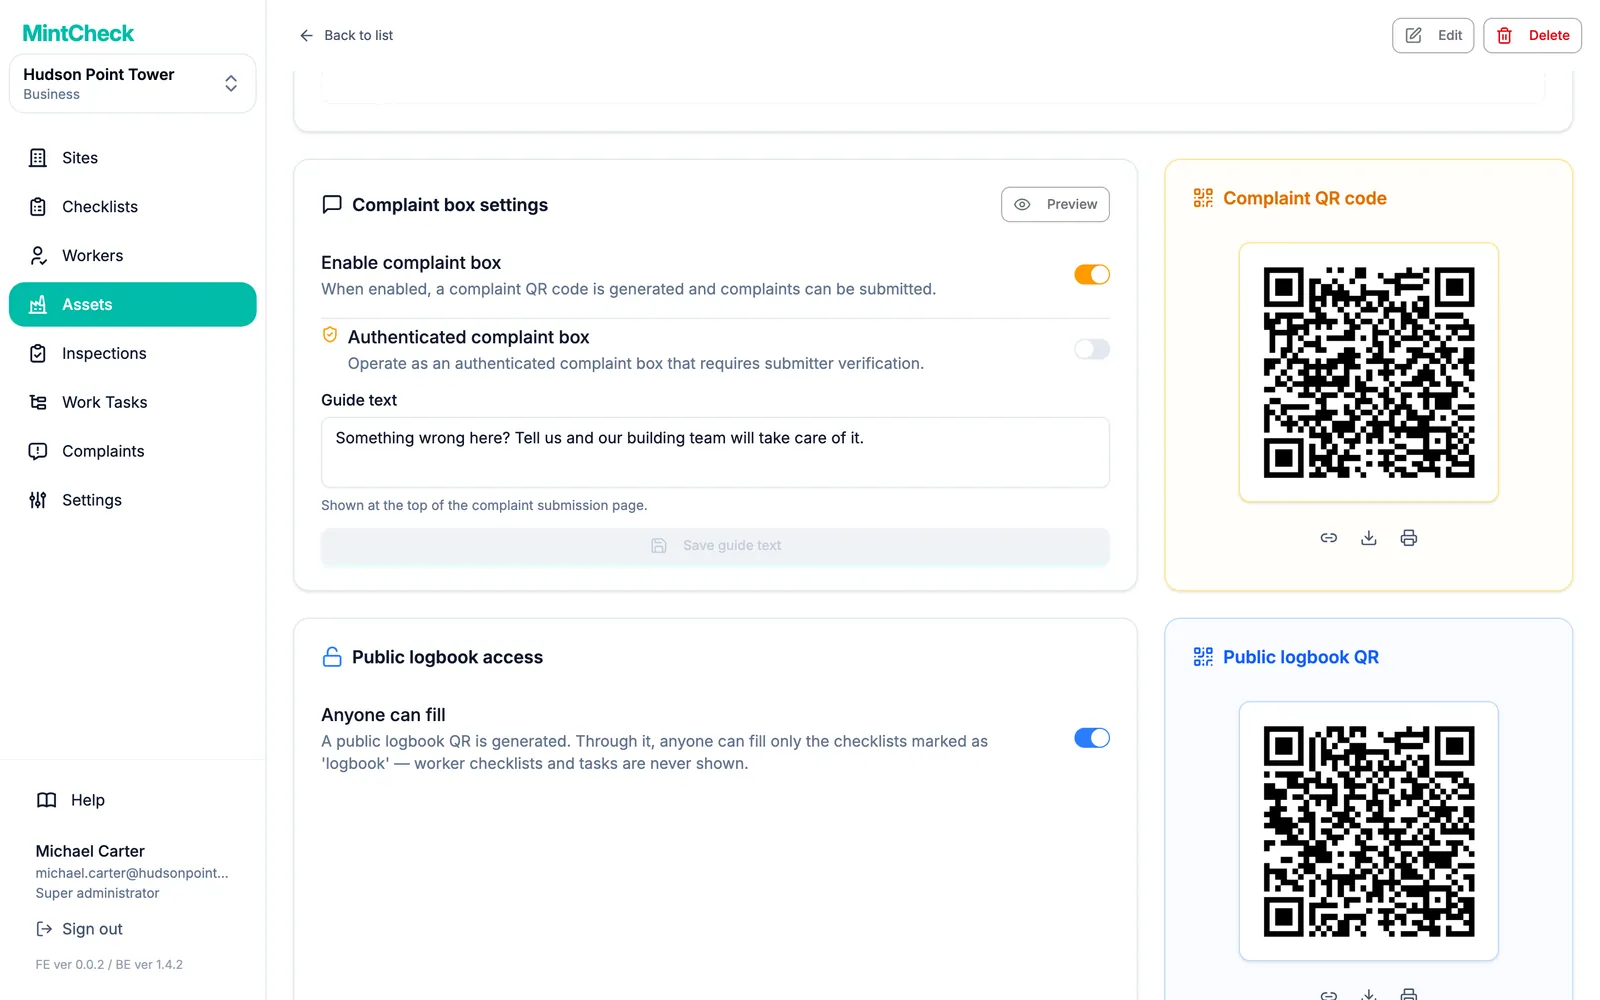
To stop receiving complaints, turn Enable complaint box off. Visitors who scan the QR code then see a message that the asset is not accepting complaints.
Require email verification
By default, visitors can send a complaint without proving who they are. If you get fake or repeated complaints, you can ask for an email check.
- In Complaint box settings, make sure the complaint box is on.
- Turn on Authenticated complaint box.
From then on, the visitor must enter an email address and click Send code. MintCheck emails a 6-digit code. The visitor types the code and clicks Verify. Only then can they send the complaint.
What visitors see
When a visitor scans the complaint QR code, a simple form opens on their phone:
- The asset name and your guide text at the top.
- Content: a box to describe the problem. This is required.
- Attach photos: up to 3 photos, taken with the phone camera.
- One of these:
- If verification is off: an optional contact field. Visitors who want to hear back can leave an email or phone number.
- If verification is on: Identity verification, with the email code steps described above.
- Submit complaint. After sending, the visitor sees a confirmation and can send another complaint.
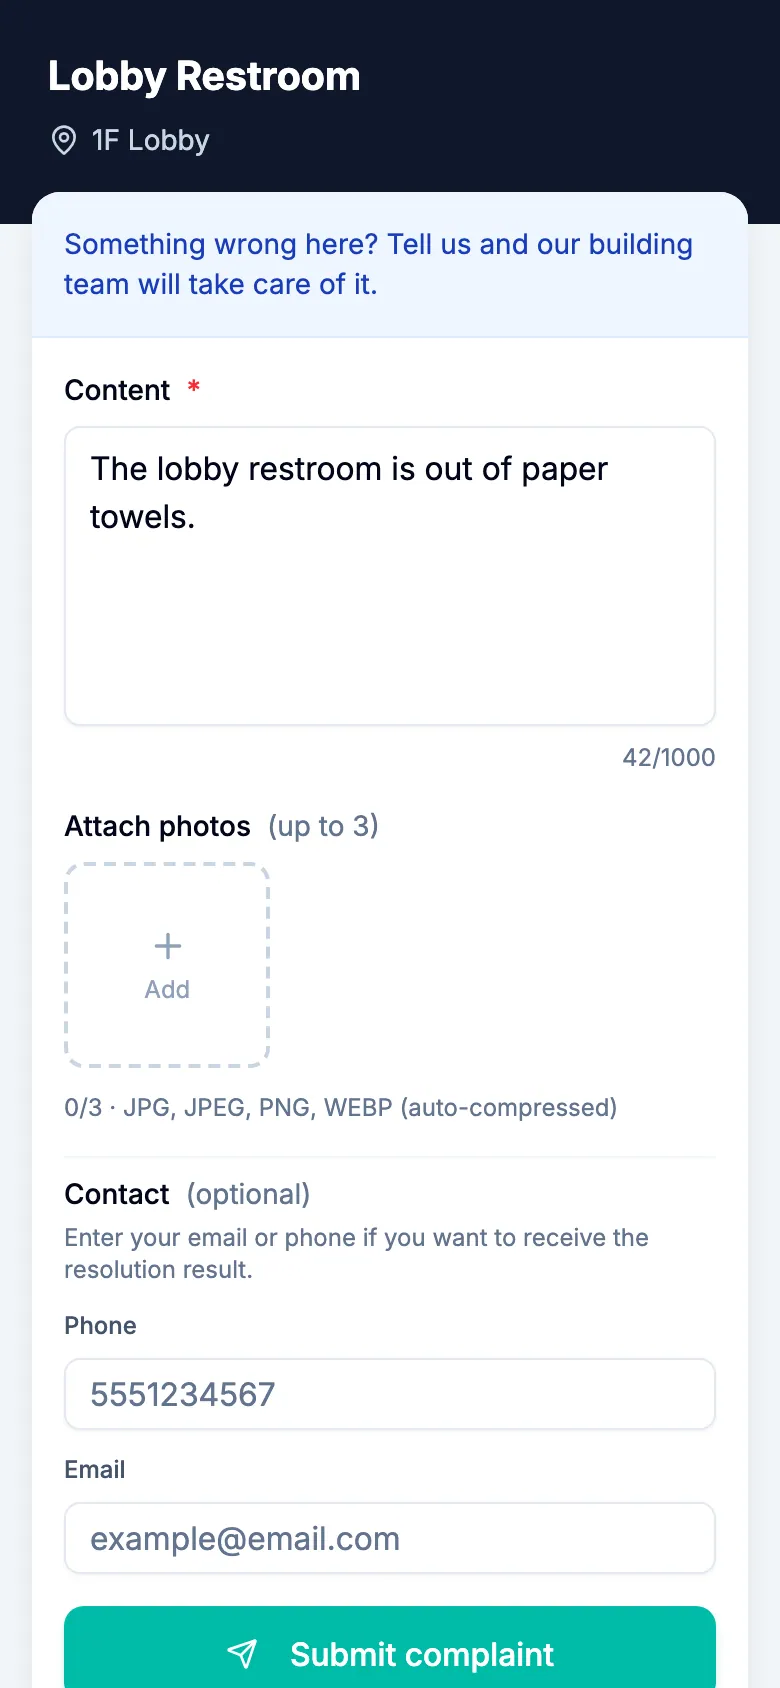
The visitor does not need to sign in or install anything. The form shows the visitor's phone language.
Where complaints arrive
New complaints appear in two places:
- Complaints in the sidebar, which lists complaints from all assets of the site. See Complaints for how to handle and close them.
- Complaints at the bottom of the asset detail page, which lists only this asset's complaints.
If the visitor left an email address, you can see it in the complaint details and contact them about the result.